
Yammer I Redesign
Date: 2018 - Current
Yammer is a platform to work smarter, work together and connect with people across your organization to make better decisions, faster. Yammer's hidden power & value also comes from sharing knowledge and finding expert advise within communities. Yammer's last redesign was over five years ago. This created a fantastic opportunity to elevate its aesthetic towards a modern look & feel and reduce Yammer's cluttering UI; a specific pain point for our customers. Our goals for Yammer's redesign are to drive employee engagement and afford our customers to connect across hierarchies & teams within an organization.
Case Study | Outline
Team | Individual Contribution
Design Process | An In-depth Look
High Fidelity | A New Look
Result | The Outcome
Team | Individual Contribution
TEAM - 12
Director of Product
Product Managers (2)
Researcher (4)
Product Designers (5)
POSITION ON TEAM
Principal Product Designer | Visual Design
MY PART (within the redesign)
Yammer's Aesthetic (Color, Typography, Visual Presence)
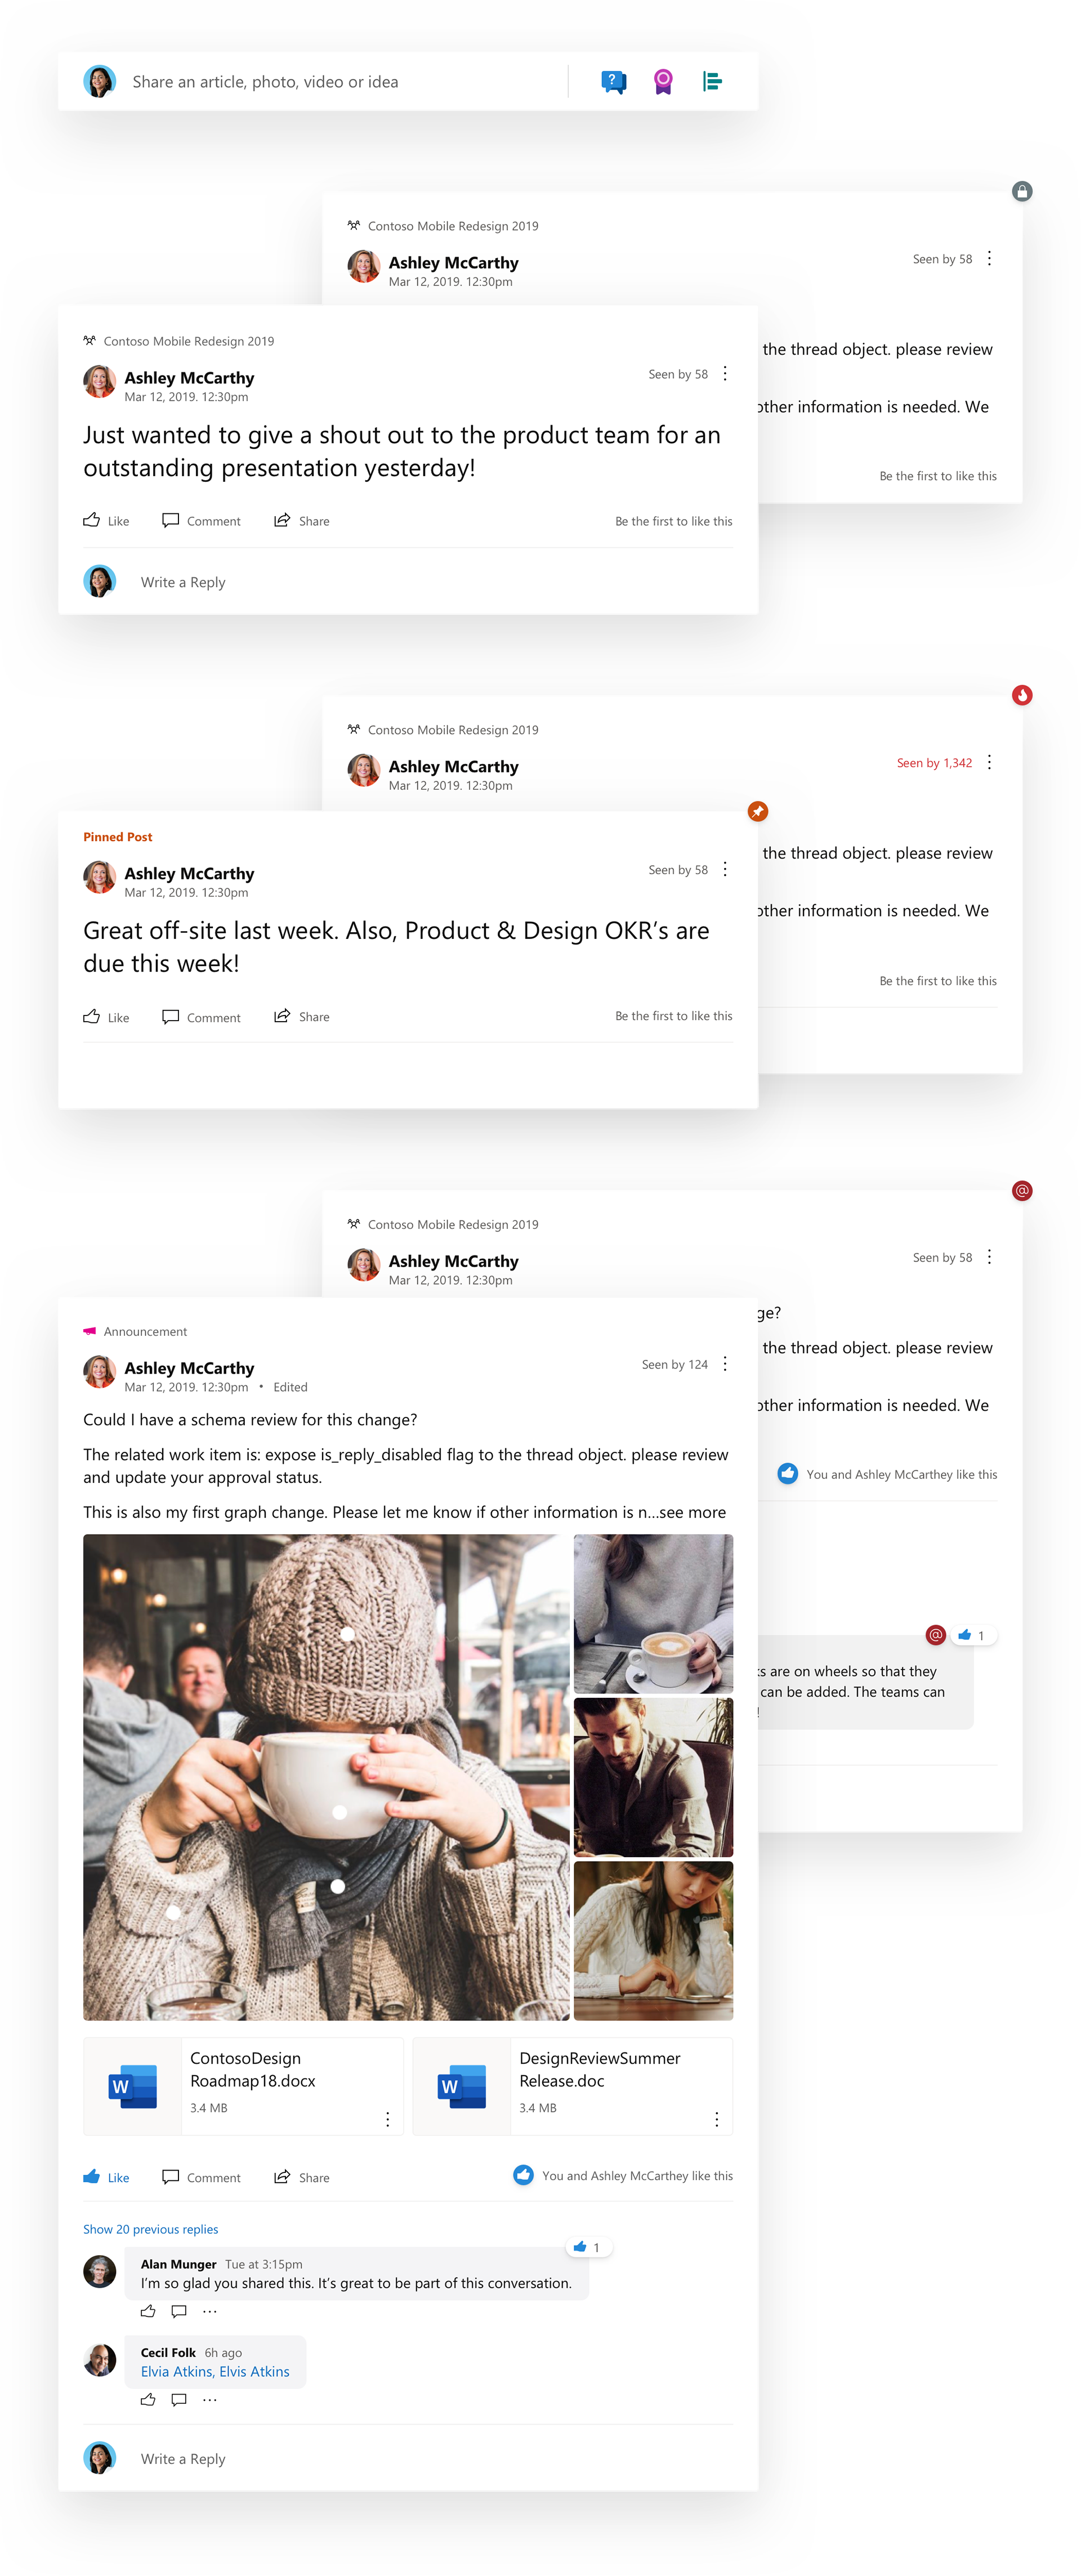
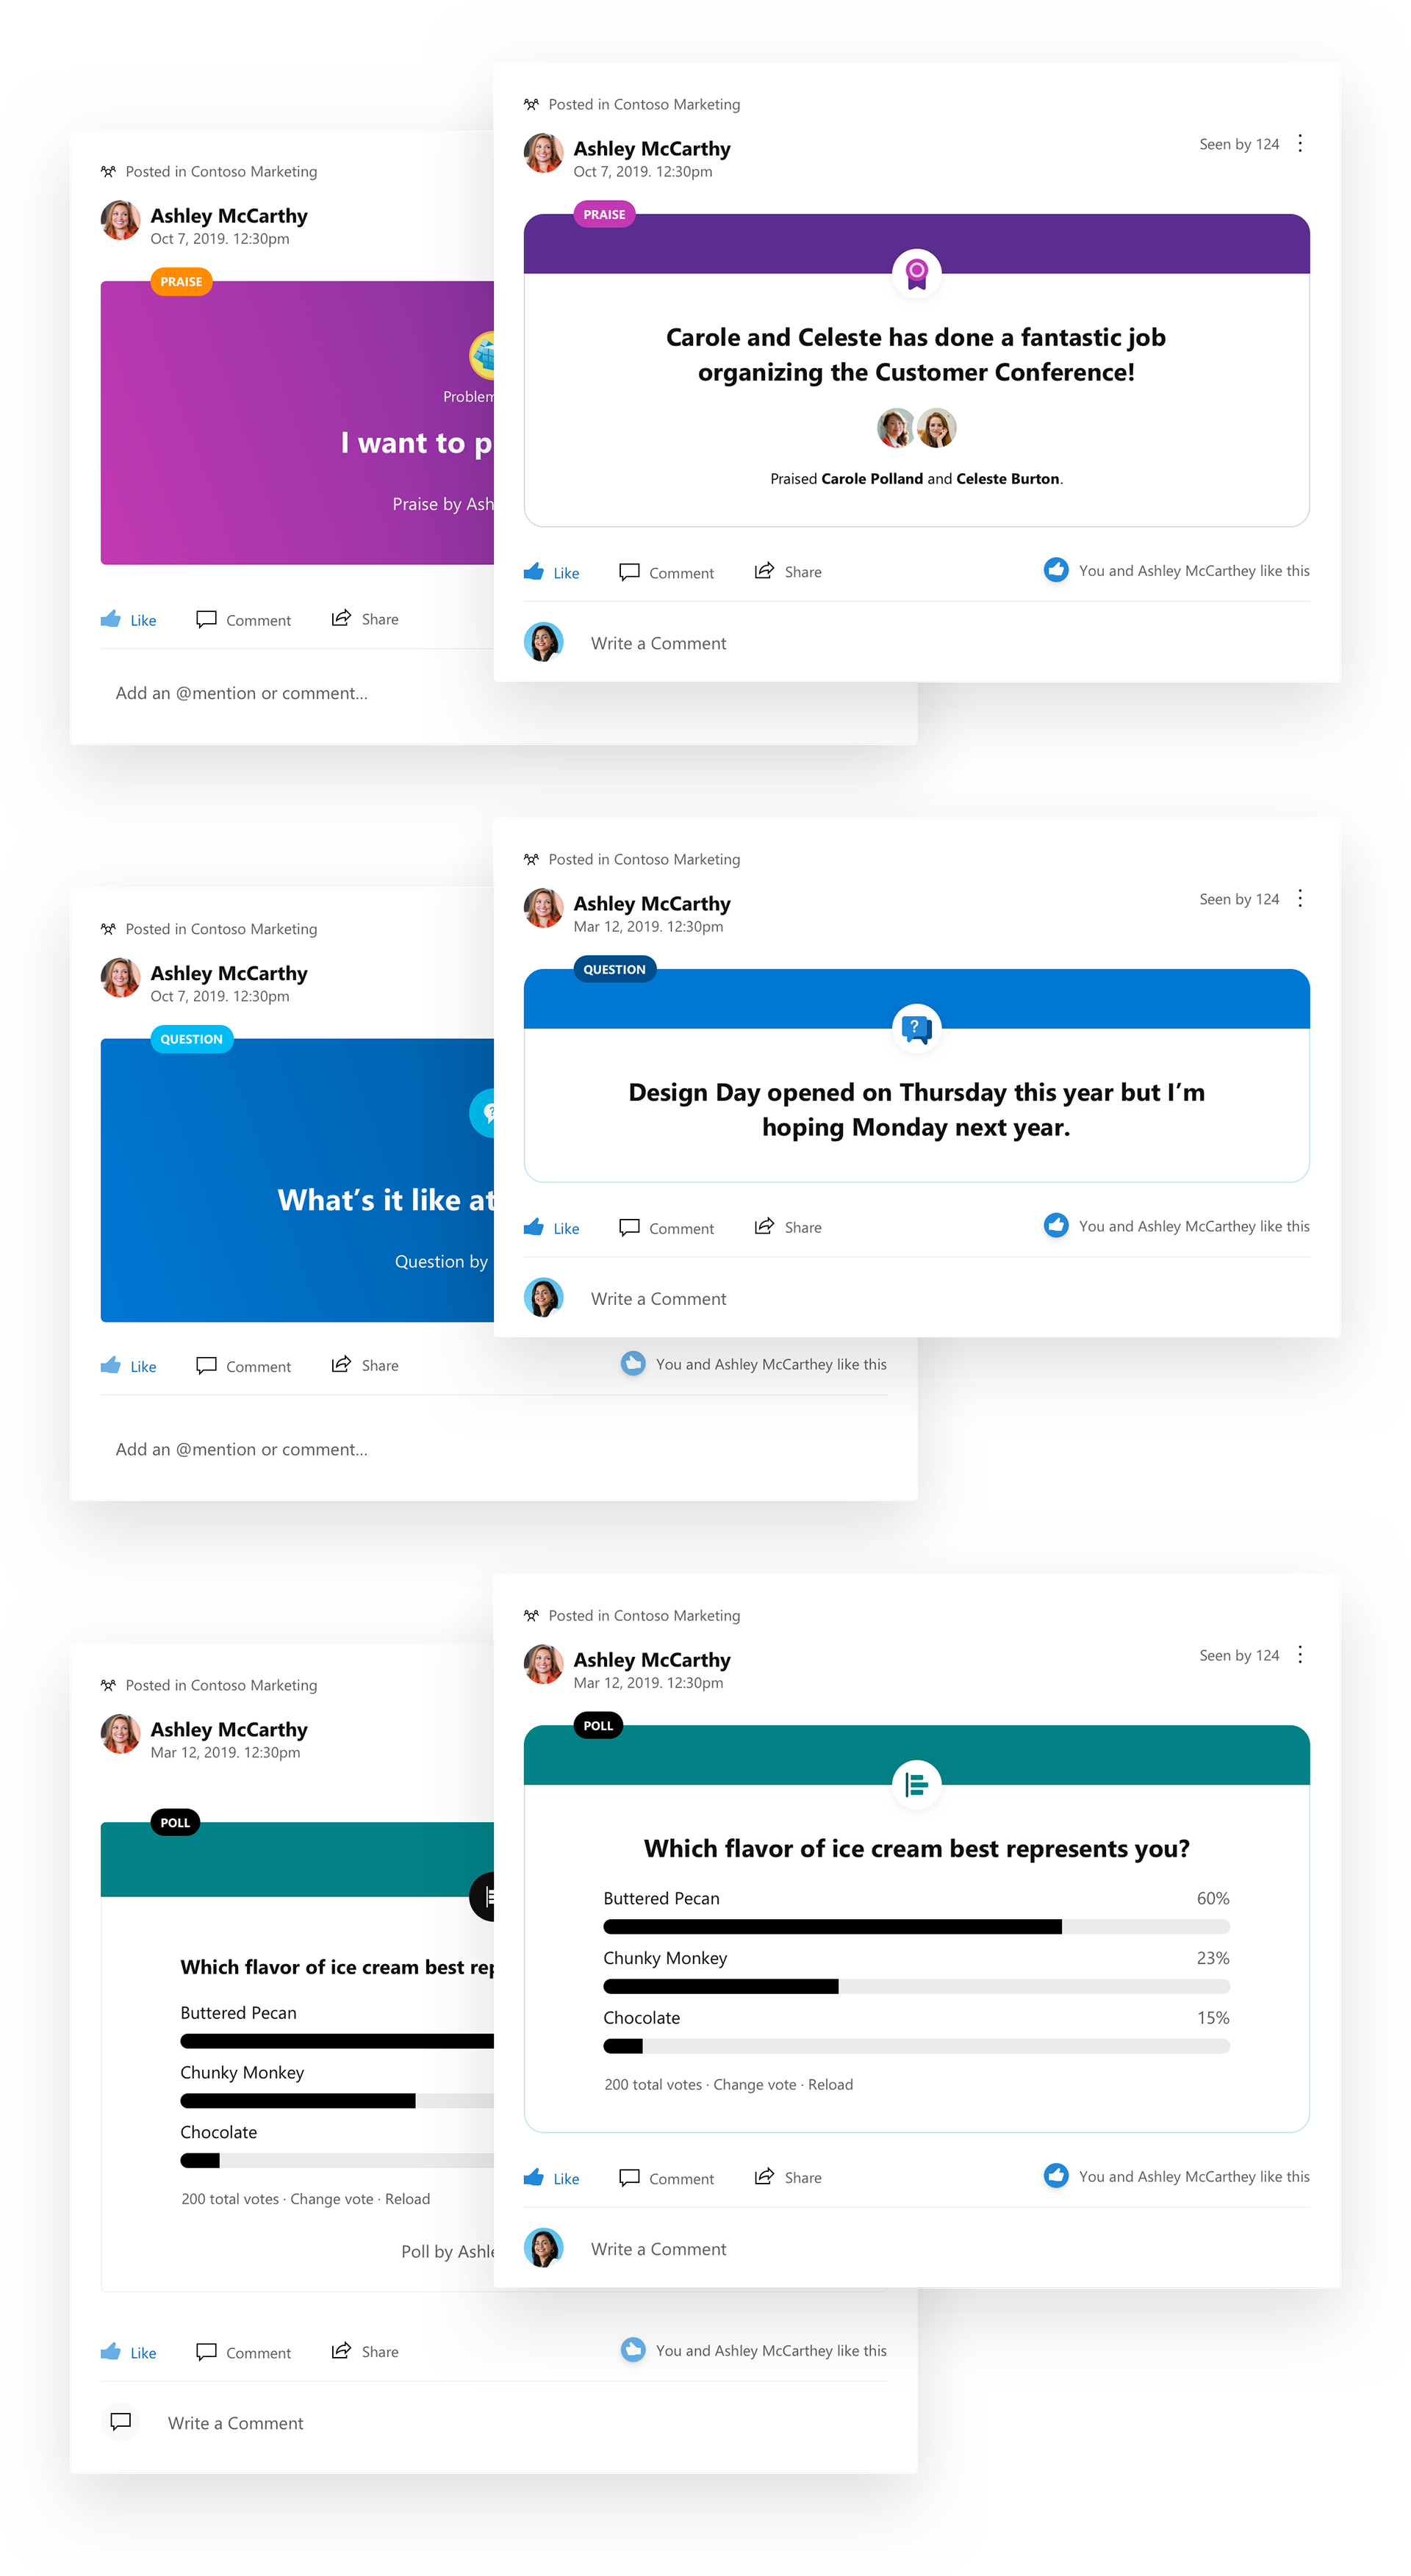
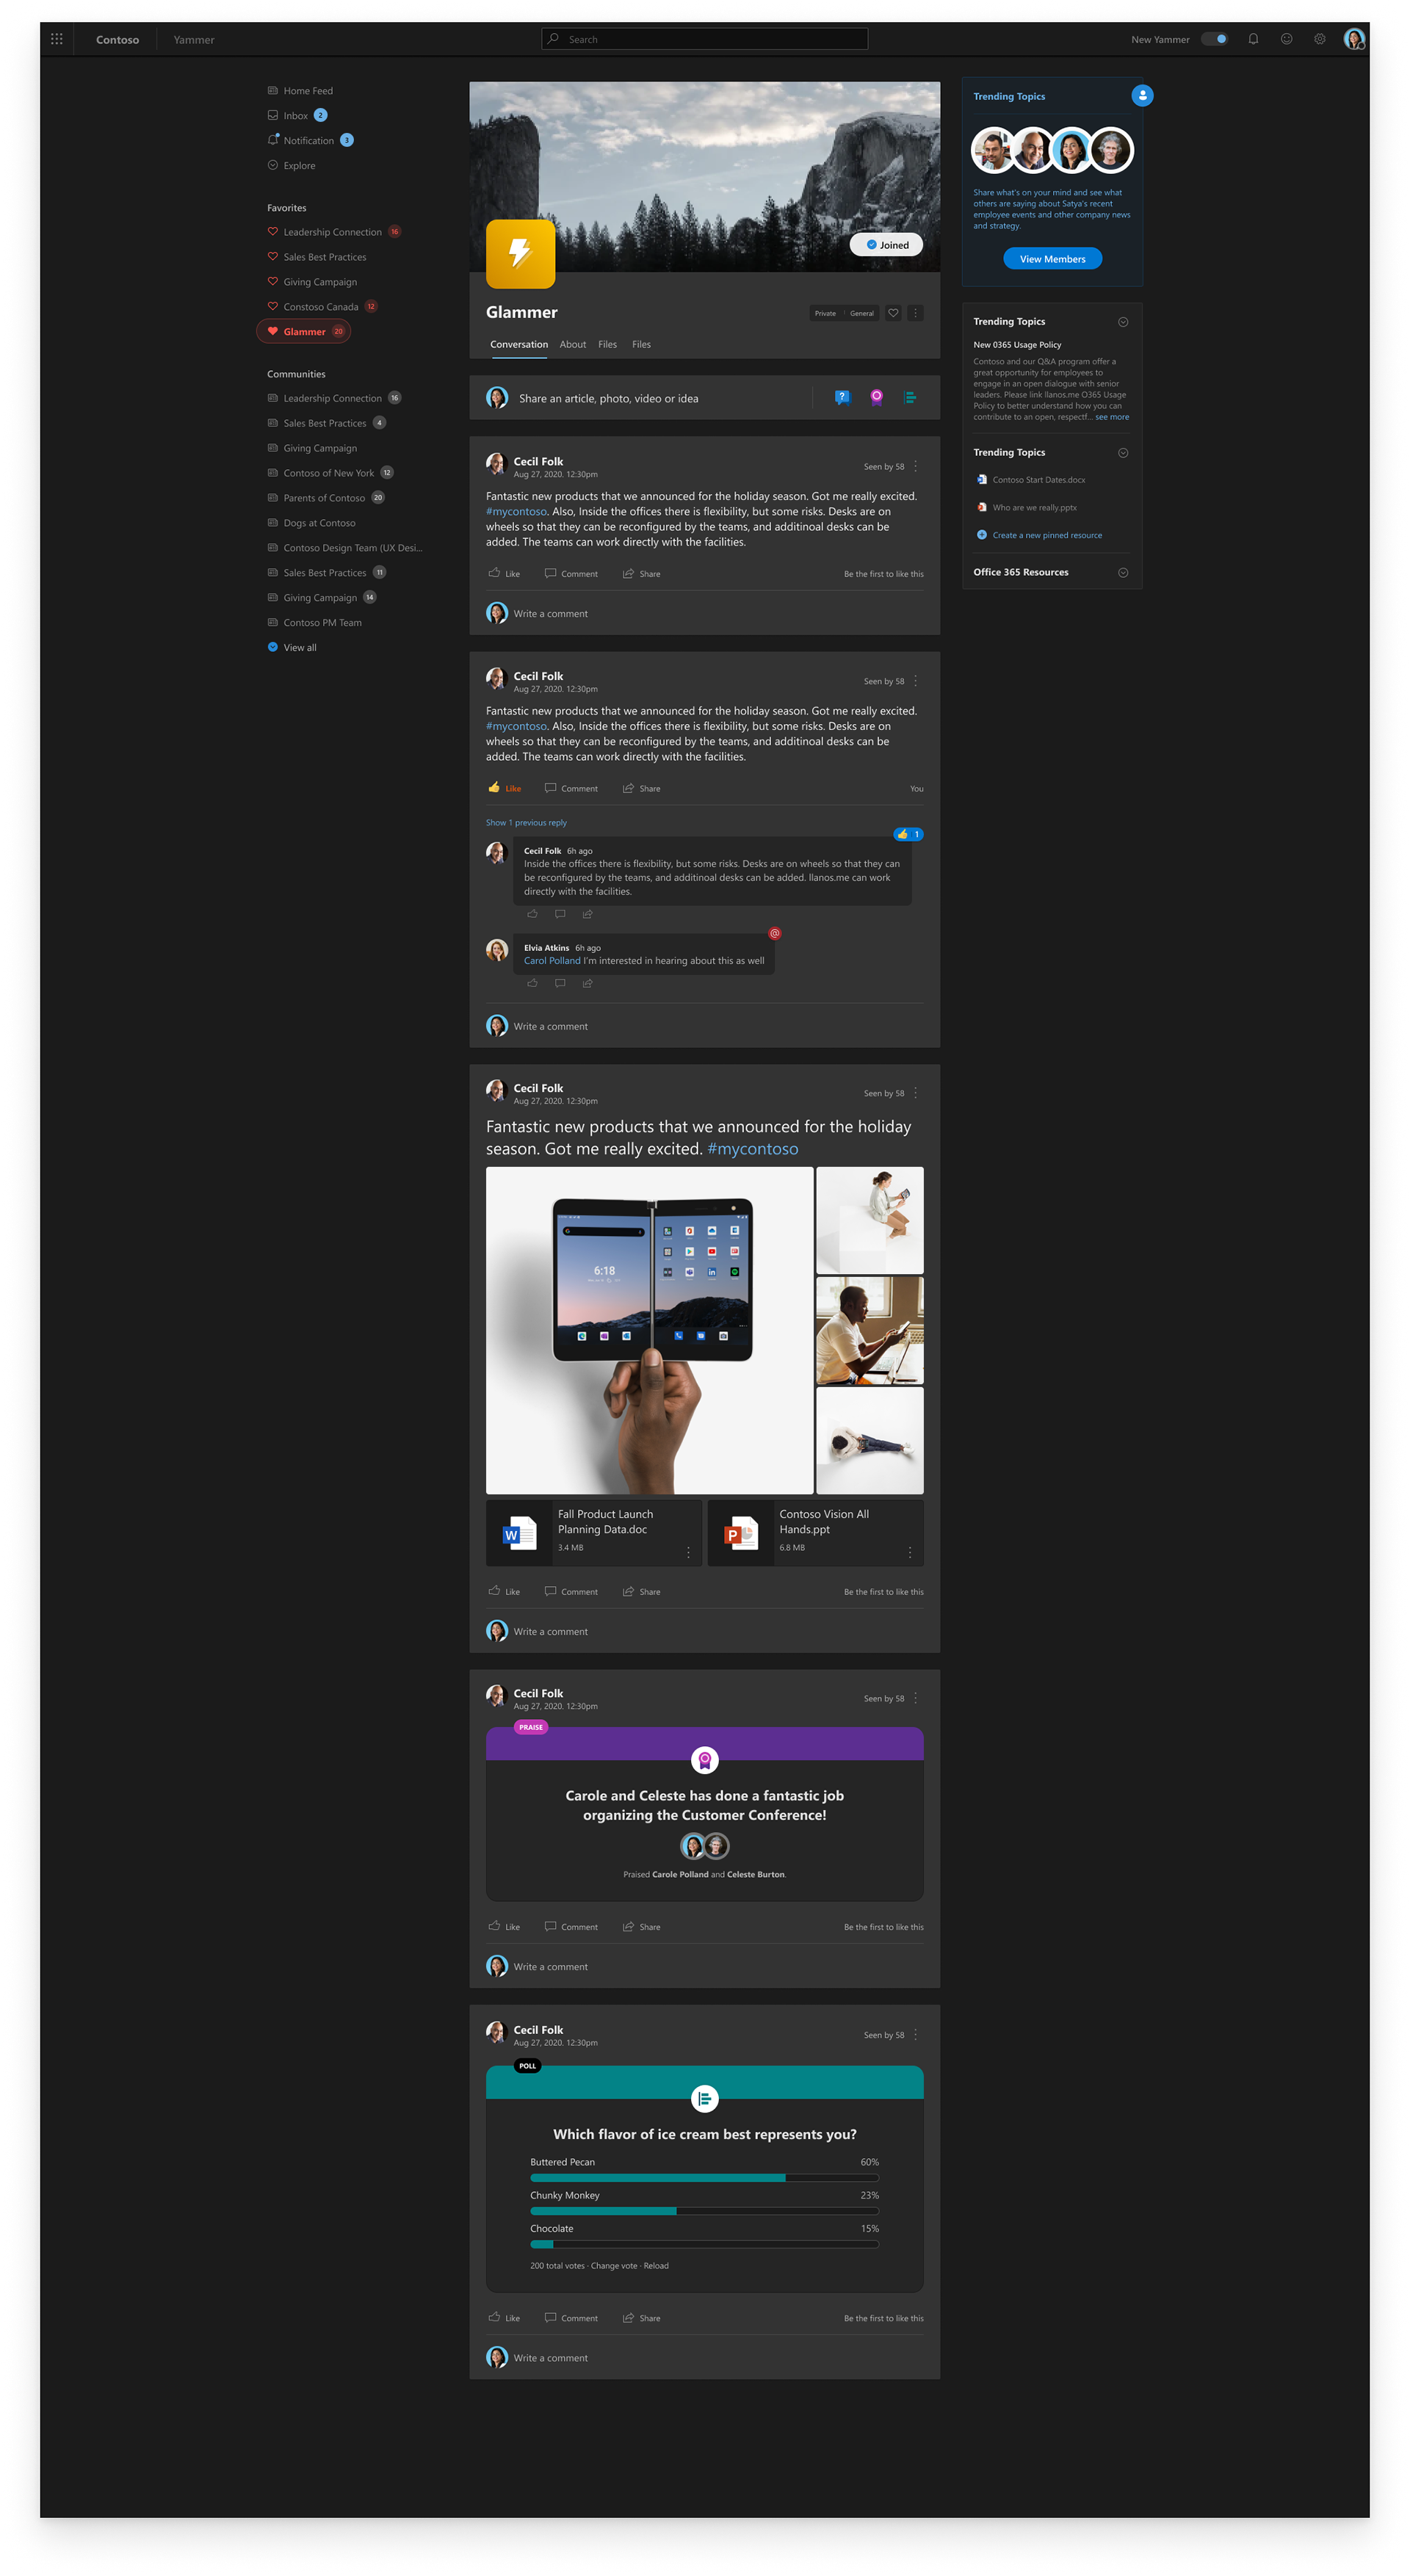
Published Post Types (Question, Praise & Polls)
Inbox - UI / UX
Search - UI / UX
Reactions - UI / UX
Nested Replies - UI / UX
Communities - UI / UX
Design Process | An in Depth Look
Below is an in-depth overview that details a design process that helped uncover design problems, find design solutions, and solve customers' needs. It afforded ways to create solution sketches, receive peer feedback, build prototypes and get critical feedback from our customers.
Most importantly, through this design process I was able to validate and feel confident conveying my decisions to stake-holders while cleanly managing my day-to-day work flow.
Design Process | Outline
01 Map | Understand the problem
02 Sketch | Sketch solutions
03 Decide | Choose a direction and storyboard
04 Prototype | Design mocks and create a prototype
05 Test | Get feedback on your prototype
Based off Google Ventures design process
01 Map | Understand the Problem
• User Interviews
• User Interviews
• User Stories
OBJECTIVE
In the mapping phase, User Interviews & User Stories help me understand:
In the mapping phase, User Interviews & User Stories help me understand:
- What problem(s) am I trying to solve?
- Who am I trying to solve it for?
- Why is there a need to solve the problem?
By partnering with research & product, I was able to identify the following: customer needs, users behaviors, facts, needs & goals while making assumptions and listing out key actions that users may want to utilize in their experience.
DELIVERABLES
User Interviews
Prior to joining Yammer, research / user interviews had concluded and the decision was made to move forward with Yammer's redesign. During the first 3 months, I spent time reading user studies, user stories, product road maps and familiarizing myself with the product (Yammer). Also, familiarizing myself with legacy issues, understanding core customer problems, projected goals of the redesign (from a product & design perspective), scheduling 1:1's to learn the perspectives of Yammer designers, analytics team, product owners and researchers.
When this process concluded, I knew who I was designing for and the problems I had to solve. Themes in user feedback pointed to Yammer's UI feeling cluttered, overwhelming and dated. User feedback was also based around engagement and Yammer's purpose; "Why Yammer? Why not slack?"
User Stories
Reading through the User Stories, I was able to abstractly understand customer's paint points which helped formulate potential design solutions to solve their needs.
RESULTS
The result of these two deliverables helped me understand the needs of our customers, goals (as a team) and smoothly transition into the Sketch phase.
My job was to redesign Yammer's UI, published Post Types, Search, Inbox and hopefully deliver a beautiful experience that our customers would love and want to return.
02 Sketch | Sketch Solutions
• Lightning Demo
• Lightning Demo
• Solution Sketches
OBJECTIVE
In the sketching phase my objective is to turn abstract needs into concrete ideas to solve the users needs via Lightning Demos and Solution Sketches.
In the sketching phase my objective is to turn abstract needs into concrete ideas to solve the users needs via Lightning Demos and Solution Sketches.
DELIVERABLES
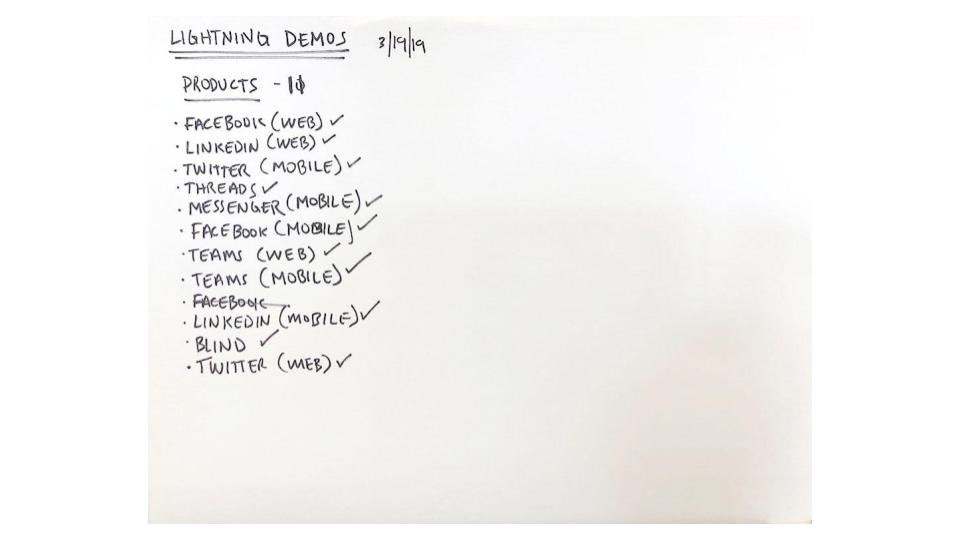
Lightning Demo
Lightning Demo
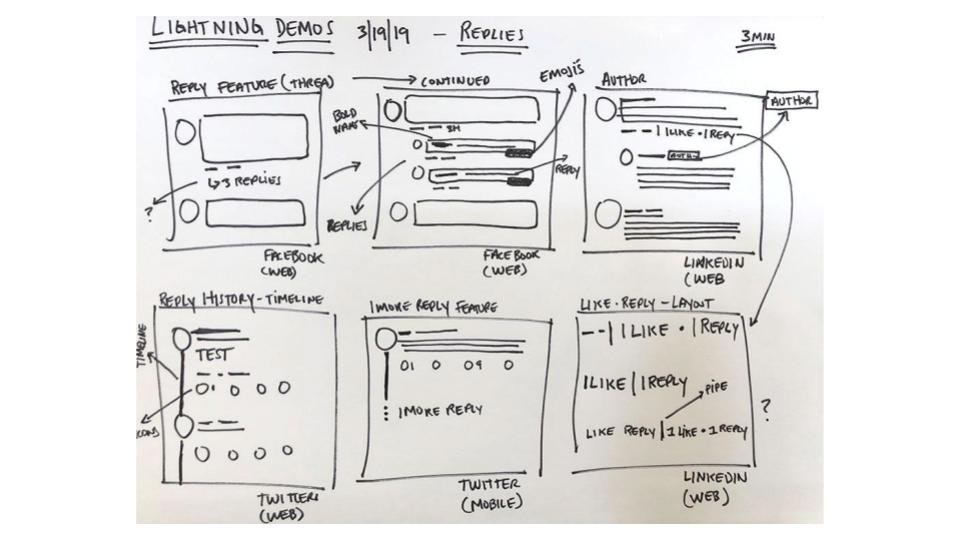
In the Sketch phase, it was time to turn abstract needs (user-stories) into concrete ideas. I love lighting-demos because it's my opportunity to look at what our competitors are doing well (or not) and capture ideas to help solve my design problem(s).
I repeated this process for Yammer's visual UI, published Post Types, Inbox, Search and Left Nav (UI). I looked at 10-20 products spending no more than three minutes per product assessing features. The time constraint helped me focus on design ideas while not spending too much time on any particular feature. As I'm looking at each product, I'm capturing ideas for my Lightning Demo sketches and prepping for Solution Sketching.
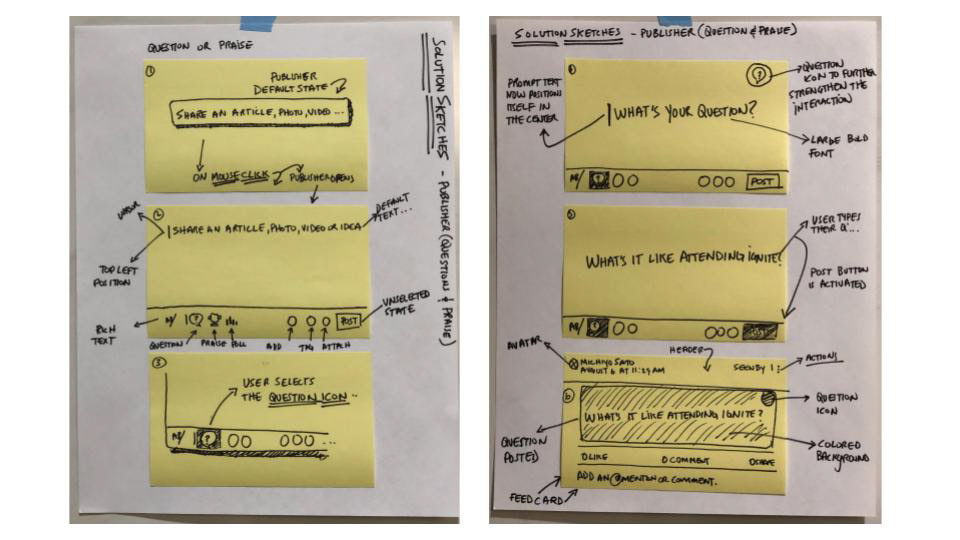
Solution Sketches
In the Solution Sketch phase, I'm creating solutions for Yammer that will begin to form new ideas for Yammer's UI, published Post Types, Inbox, Search and Left Nav. I repeated this process about 5x's, per feature.
RESULTS
With multiple rounds of Lightning Demos & Solution Sketching, I'm ready to receive critical feedback from my team.
Lightning Demo (sketches)
Solution Sketch (publisher)
03 Decide | Choose Direction and Storyboard
• Getting Feedback
• Getting Feedback
• Storyboard
OBJECTIVE
In the deciding phase, the objectives are to collect my team's feedback and decide which Solution Sketch solves the problem best. Having the opportunity to gather feedback from my peers, proved to be a vital component in the redesign process. It allowed my team to know exactly where I'm at and the decisions that were being made.
In the deciding phase, the objectives are to collect my team's feedback and decide which Solution Sketch solves the problem best. Having the opportunity to gather feedback from my peers, proved to be a vital component in the redesign process. It allowed my team to know exactly where I'm at and the decisions that were being made.
DELIVERABLES
Getting Feedback*
Getting Feedback*
At this point, I have my Solution Sketches and I'm ready to receive feedback. Receiving critical feedback can be difficult but if approached with a humble mindset, not only will you become a stronger designer, your Solution Sketches have a better chance at solving the problem. Before getting feedback from my Team or a peer, I explain the goal and context. I let my team or a designer know that I'm looking for two types of feedback; Usefulness and Usability.
Usefulness feedback will tell me: Have I solved the problem?
Usability feedback will tell me: Are the interactions revealing what you'd expect?
Usability feedback will tell me: Are the interactions revealing what you'd expect?
Once expectations are set, the feedback session can begin.
Assessing the cost from an engineering perspective, we decided Inbox, Search, Home-Page and published Post Types were going to be skinned with our new UI. Receiving critical feedback for the features mentioned above wasn't as critical as receiving feedback for our new Left Nav. The idea of our customers having to potentially learn new ways to navigate within Yammer, was concerning.
A new proposal for the Left Nav was introduced because user studies showed when navigating within Yammer, in some cases, its static presence added no value to the experience. And, in other use-cases, the amount of navigational options became a distraction while navigation throughout Yammer. Our proposed solution was to introduce a Contextual Left Nav. This proposal caused great concern because a Contextual Left Nav, changes its options based on the experience chosen. The unique interactions of a Contextual Left Nav, made testing for it a high priority.
*An action, not a deliverable
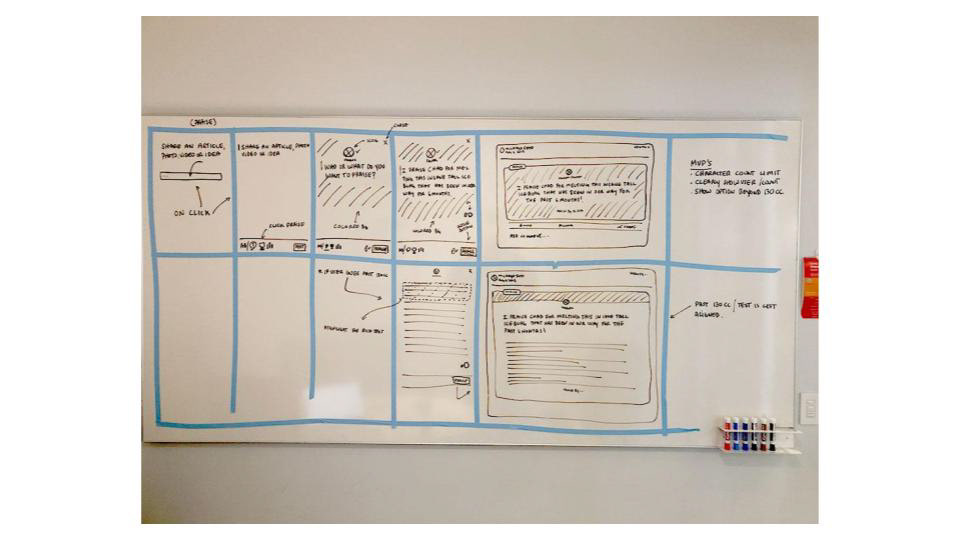
Storyboard
After receiving feedback I moved on to Storyboarding. Storyboarding expands on the winning ideas to make one cohesive solution; which is the basis of our prototype. I storyboard so that I can stay on track, screen by screen, click by click.
RESULTS of 03 Decide
I was able to create storyboards that would challenge and/or validate my design decisions.
Storyboard
04 Prototype | Design Mocks & Create a Prototype
• Design Mockups
• Design Mockups
• Build a Clickable Prototype
OBJECTIVE
In the prototyping phase, we believed Yammer's success would rest on navigation and our new UI. Of course, there are other important experiences that Yammer counts on to measure success (communities) but if navigating throughout Yammer became difficult and/or our new UI wasn't received well, Yammer would suddenly then run the risk of losing our core customer base. Recognizing this potential problem, the clear focus was to 'pressure' test the Left Nav and new UI.
In the prototyping phase, we believed Yammer's success would rest on navigation and our new UI. Of course, there are other important experiences that Yammer counts on to measure success (communities) but if navigating throughout Yammer became difficult and/or our new UI wasn't received well, Yammer would suddenly then run the risk of losing our core customer base. Recognizing this potential problem, the clear focus was to 'pressure' test the Left Nav and new UI.
DELIVERABLES
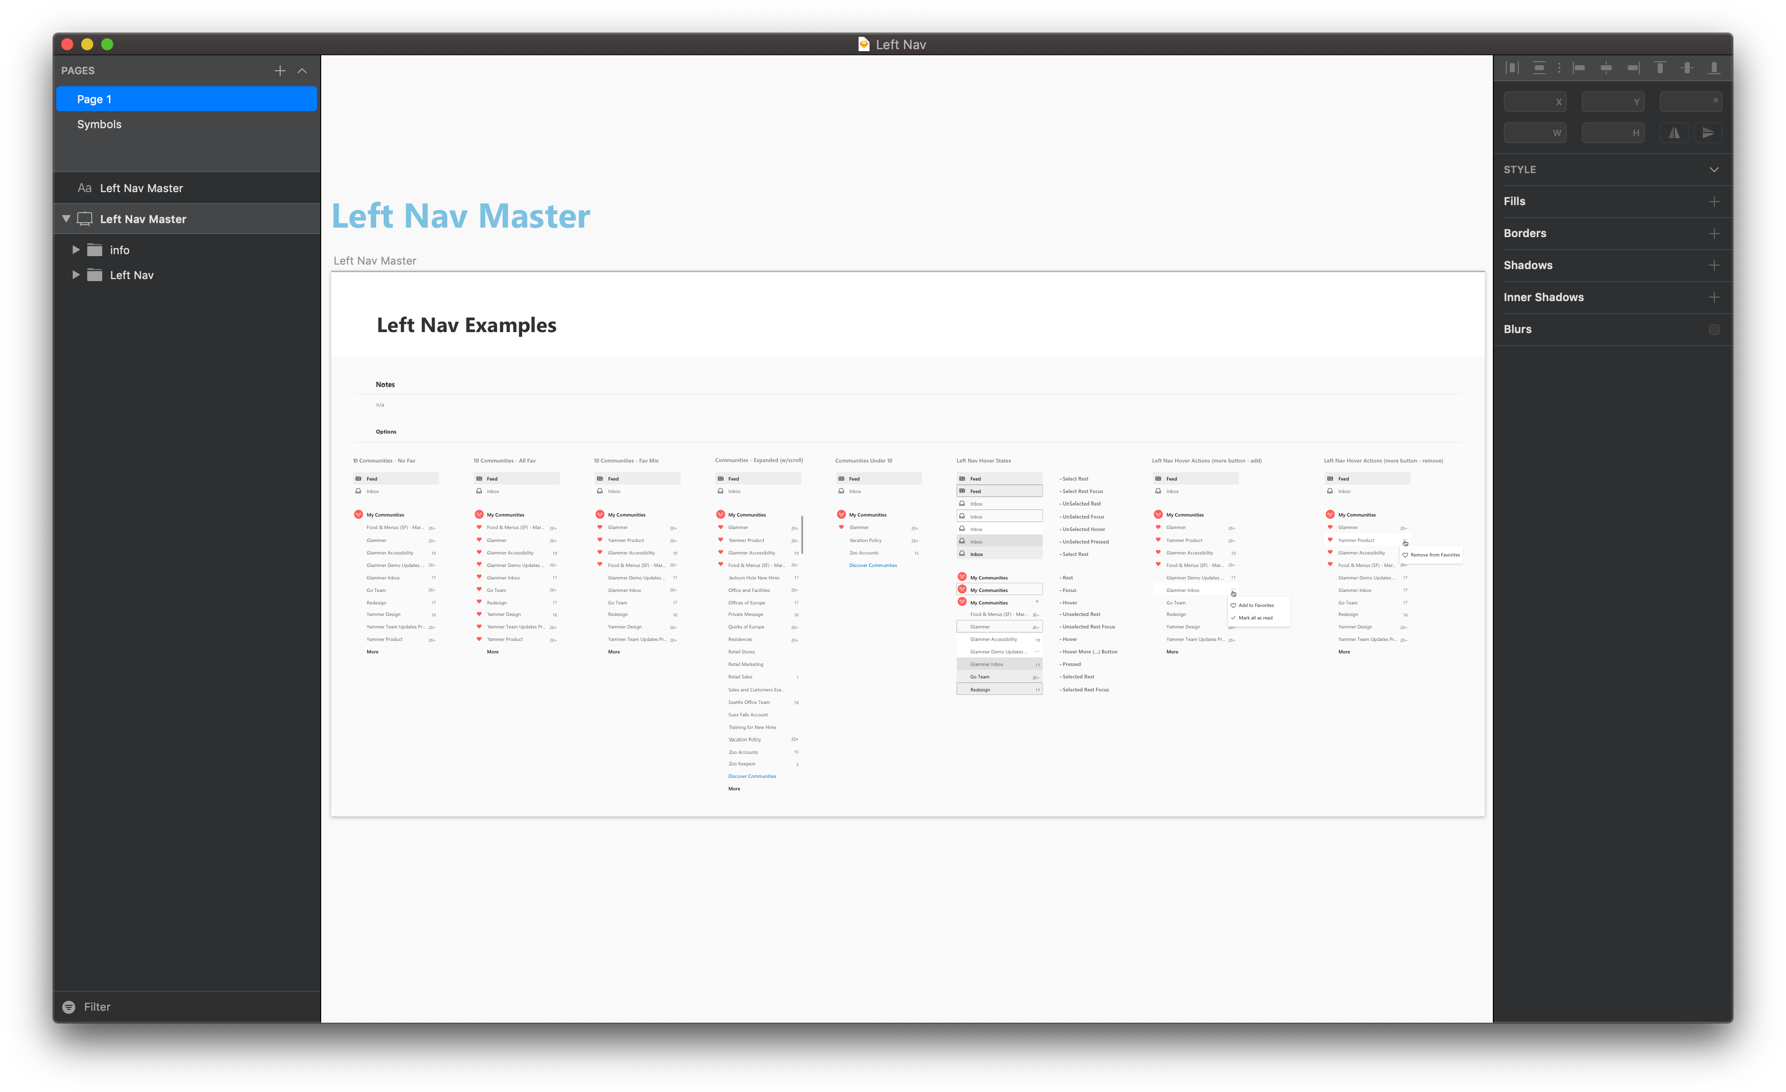
Design Mockups
Design Mockups
The prototyping phase begins by first designing mocks (in Sketch) which are guided by my storyboard. Over time the mocks increase in fidelity until they cleanly convey what I'm trying to solve. Once I'm content and can walk through each screen understanding each transition, I'll load screens into the prototyping tool of choice.
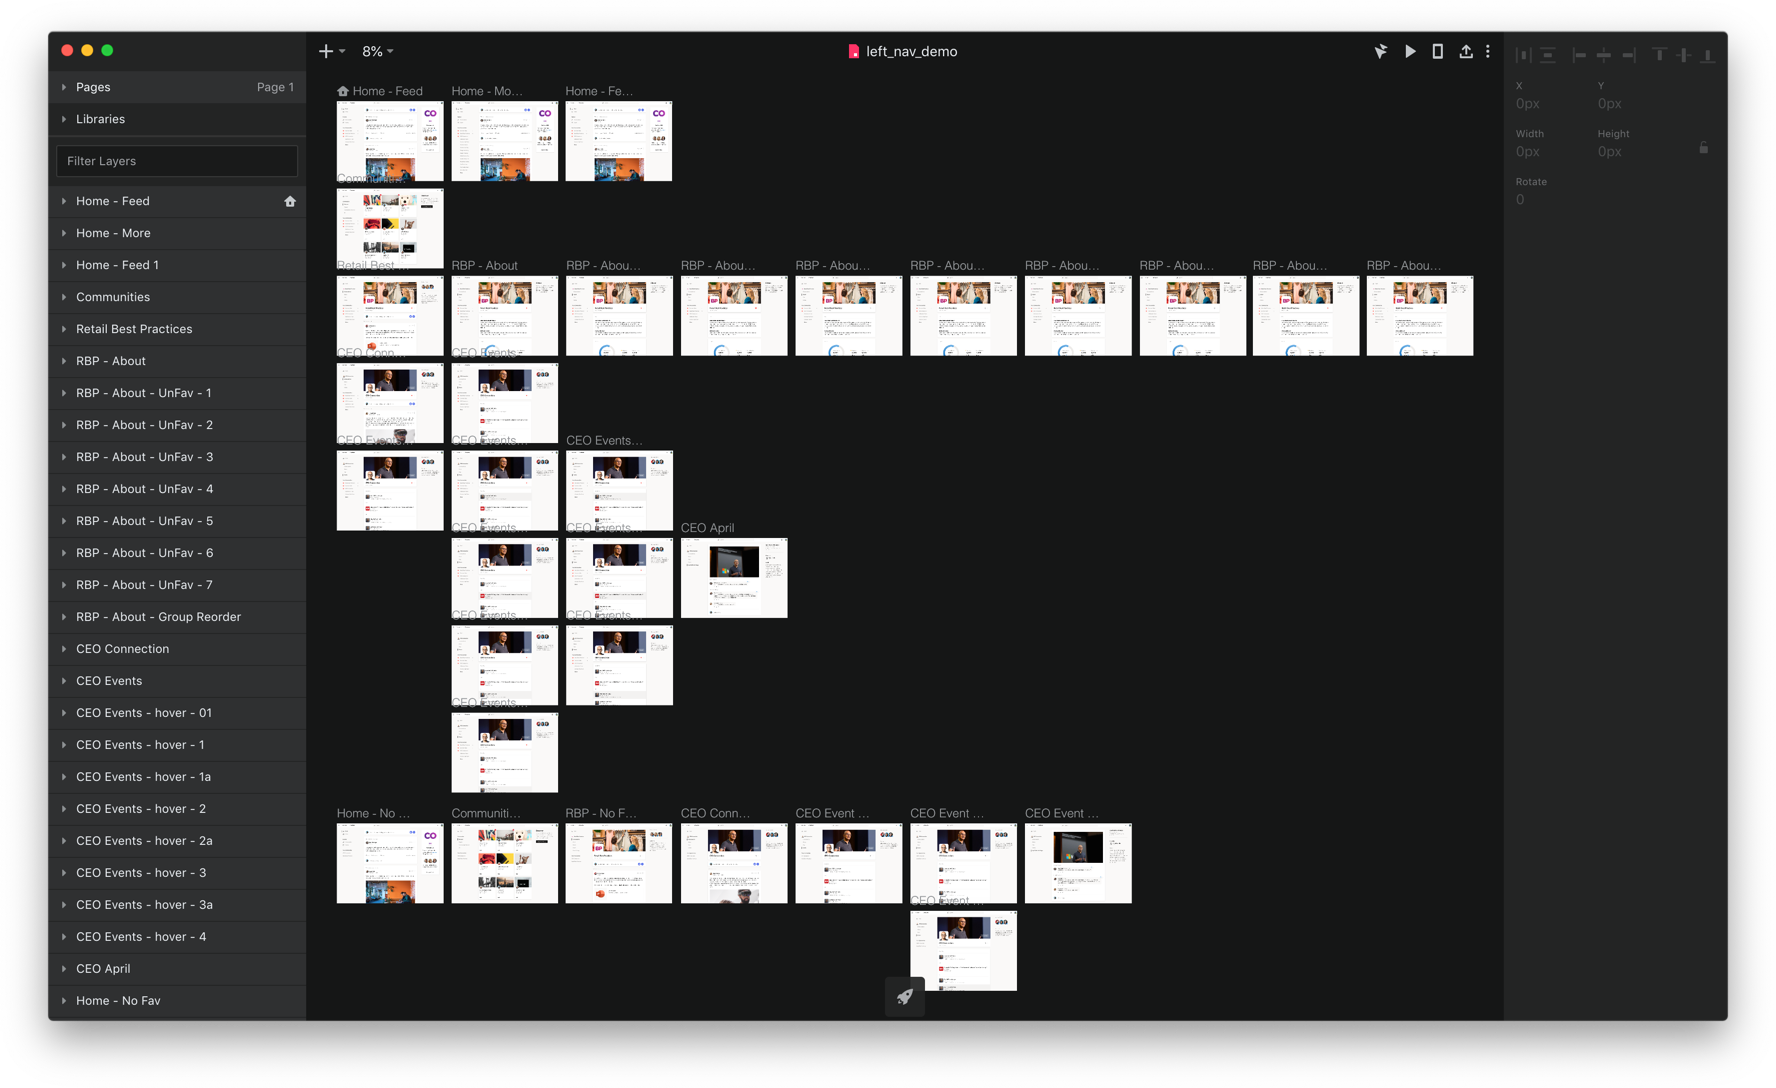
Build a Clickable Prototype
I've used prototyping tools in Sketch, Anima, InVision Studio, Principle, Google Sheets and Keynote. I'm not attached to any particular prototyping tool because I choose the tool that solves the problem best. If I'm looking to test an animating interaction, I'll go to InVision Studio or Principle. If I'm looking for a very quick prototype with minimal interactions, I'll resort to Sketch Prototype, Google Sheets or Keynote.
RESULTS
Over the course of time, I produced multiple prototypes that helped validate our design decisions.
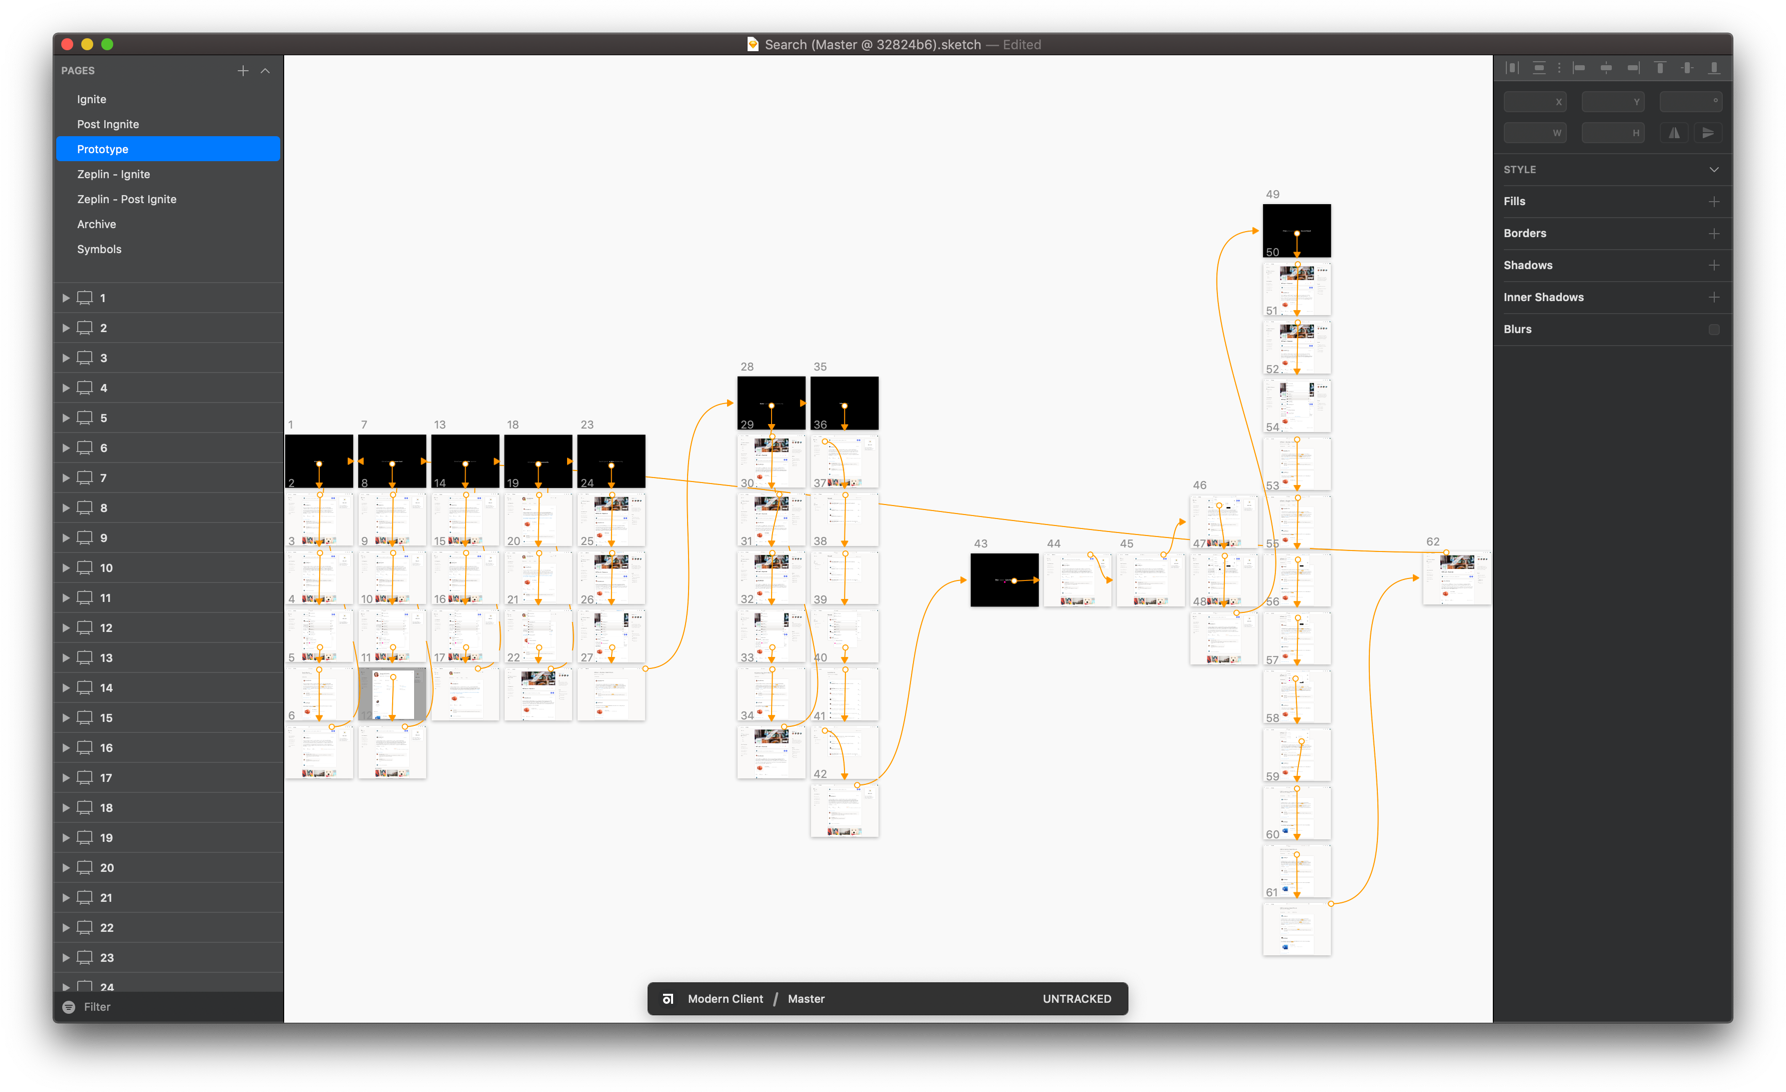
Design Mockup: Left Nav - Final
Prototype: Contextual Left Nav
Design Mockup: Search
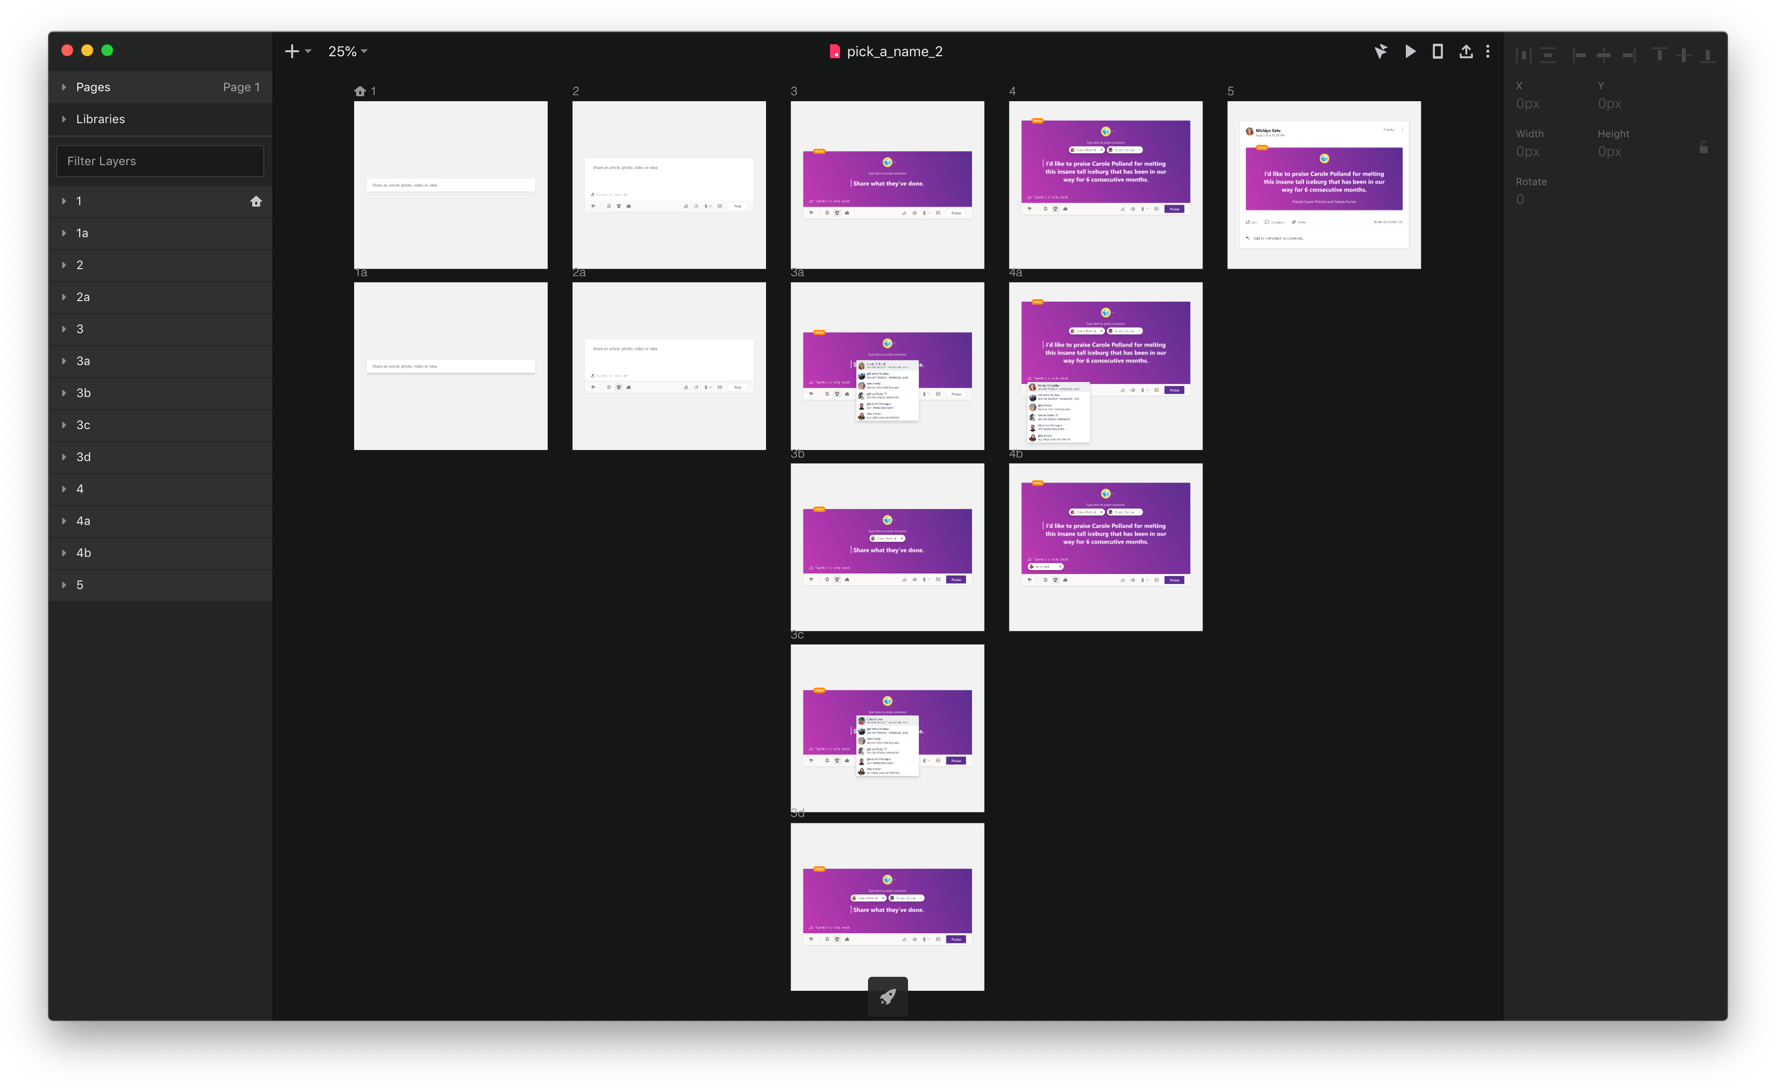
Prototype: InVision Studio (published Post Types)
05 Test | Get Feedback on Prototype
• Run a User Study
• Next Steps
OBJECTIVE
In the testing phase, I'm trying to validate my design solution and uncover pain points not yet recognized. I'm also looking to capture key insights and organize feedback patterns to help us decide our next course of action.
In the testing phase, I'm trying to validate my design solution and uncover pain points not yet recognized. I'm also looking to capture key insights and organize feedback patterns to help us decide our next course of action.
DELIVERABLES
Run a User Study
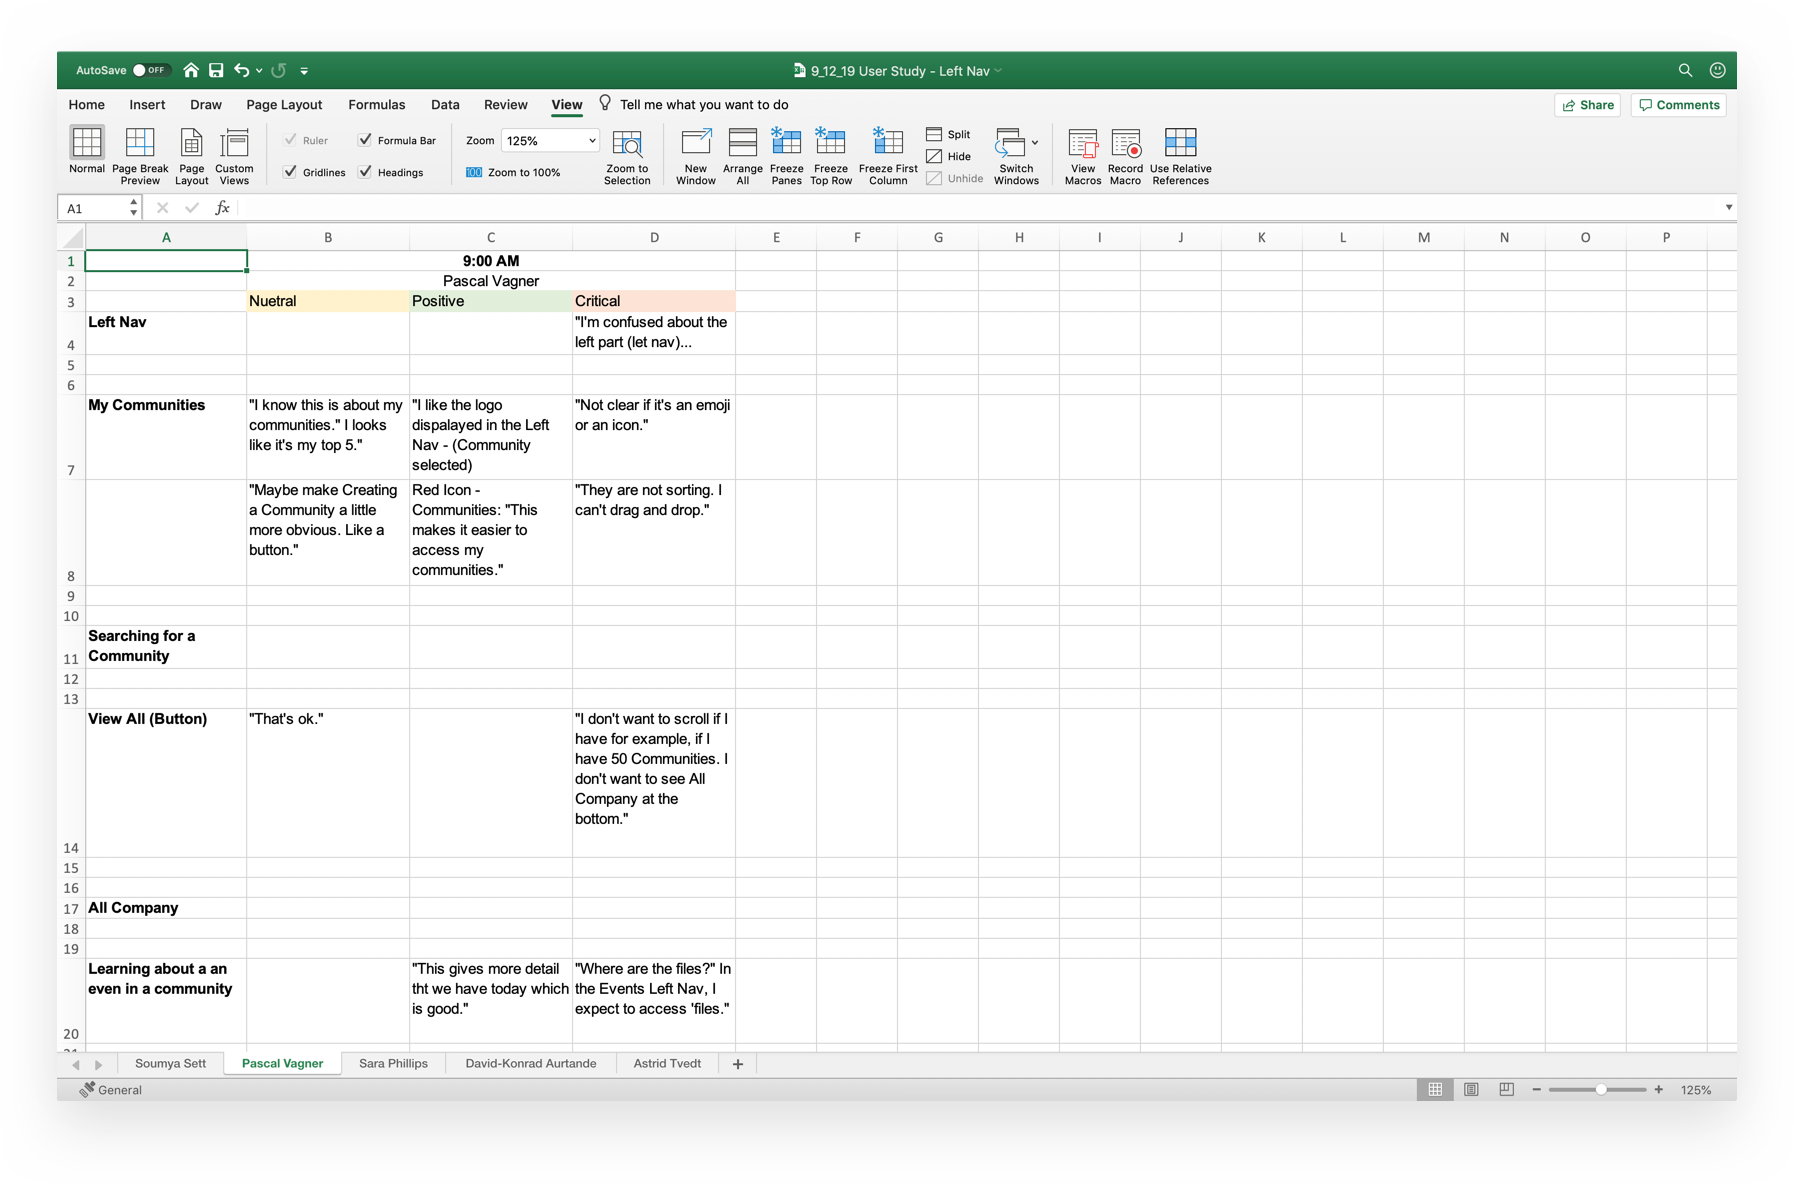
Run a User Study
Yammer's research team is in Redmond, WA and handles all user studies so there isn't much planning from a design perspective but it is our job to capture feedback. I like to use a spreadsheet that lists all the questions asked, with participants names, occupation and time of test. I then create three color buckets to capture feedback; Green for positive, Yellow for neutral and Red for negative. This also allows me to capture patterns and/or themes within the feedback. This process also allows my team to parse the feedback more efficiently.
Next Steps*
After the user testing sessions are over, we'll synthesize the feedback and collectively decide what's next (based off user feedback).
Next steps may look like:
- Revisiting and/ or recreating solutions sketches to solve a new problem (this happened quite often with our Left Nav)
- Higher fidelity screens or introduce new interactions to test further (Left Nav)
- Moving straight into visual design polish and production (Yammer's visual UI)
Anything can happen after a user study but my design process affords the flexibility to jump to any stage and continue solving the customer's problem.
*An action, not a deliverable
RESULTS
After many rounds of testing, our Left Nav and visual UI had two outcomes:
1. Our contextual Left Nav failed - horribly
2. Our refreshed visual UI was a hit.
After failing...and failing a lot, we were able to pivot, redesign a new Left Nav that finally tested well enough to give us confidence moving forward. Failing early rather than late helped us refine our Left Nav without great cost to our engineers and without jeopardizing our deadline. We are currently in the production phase but very anxious for our customers to experience the new Yammer.
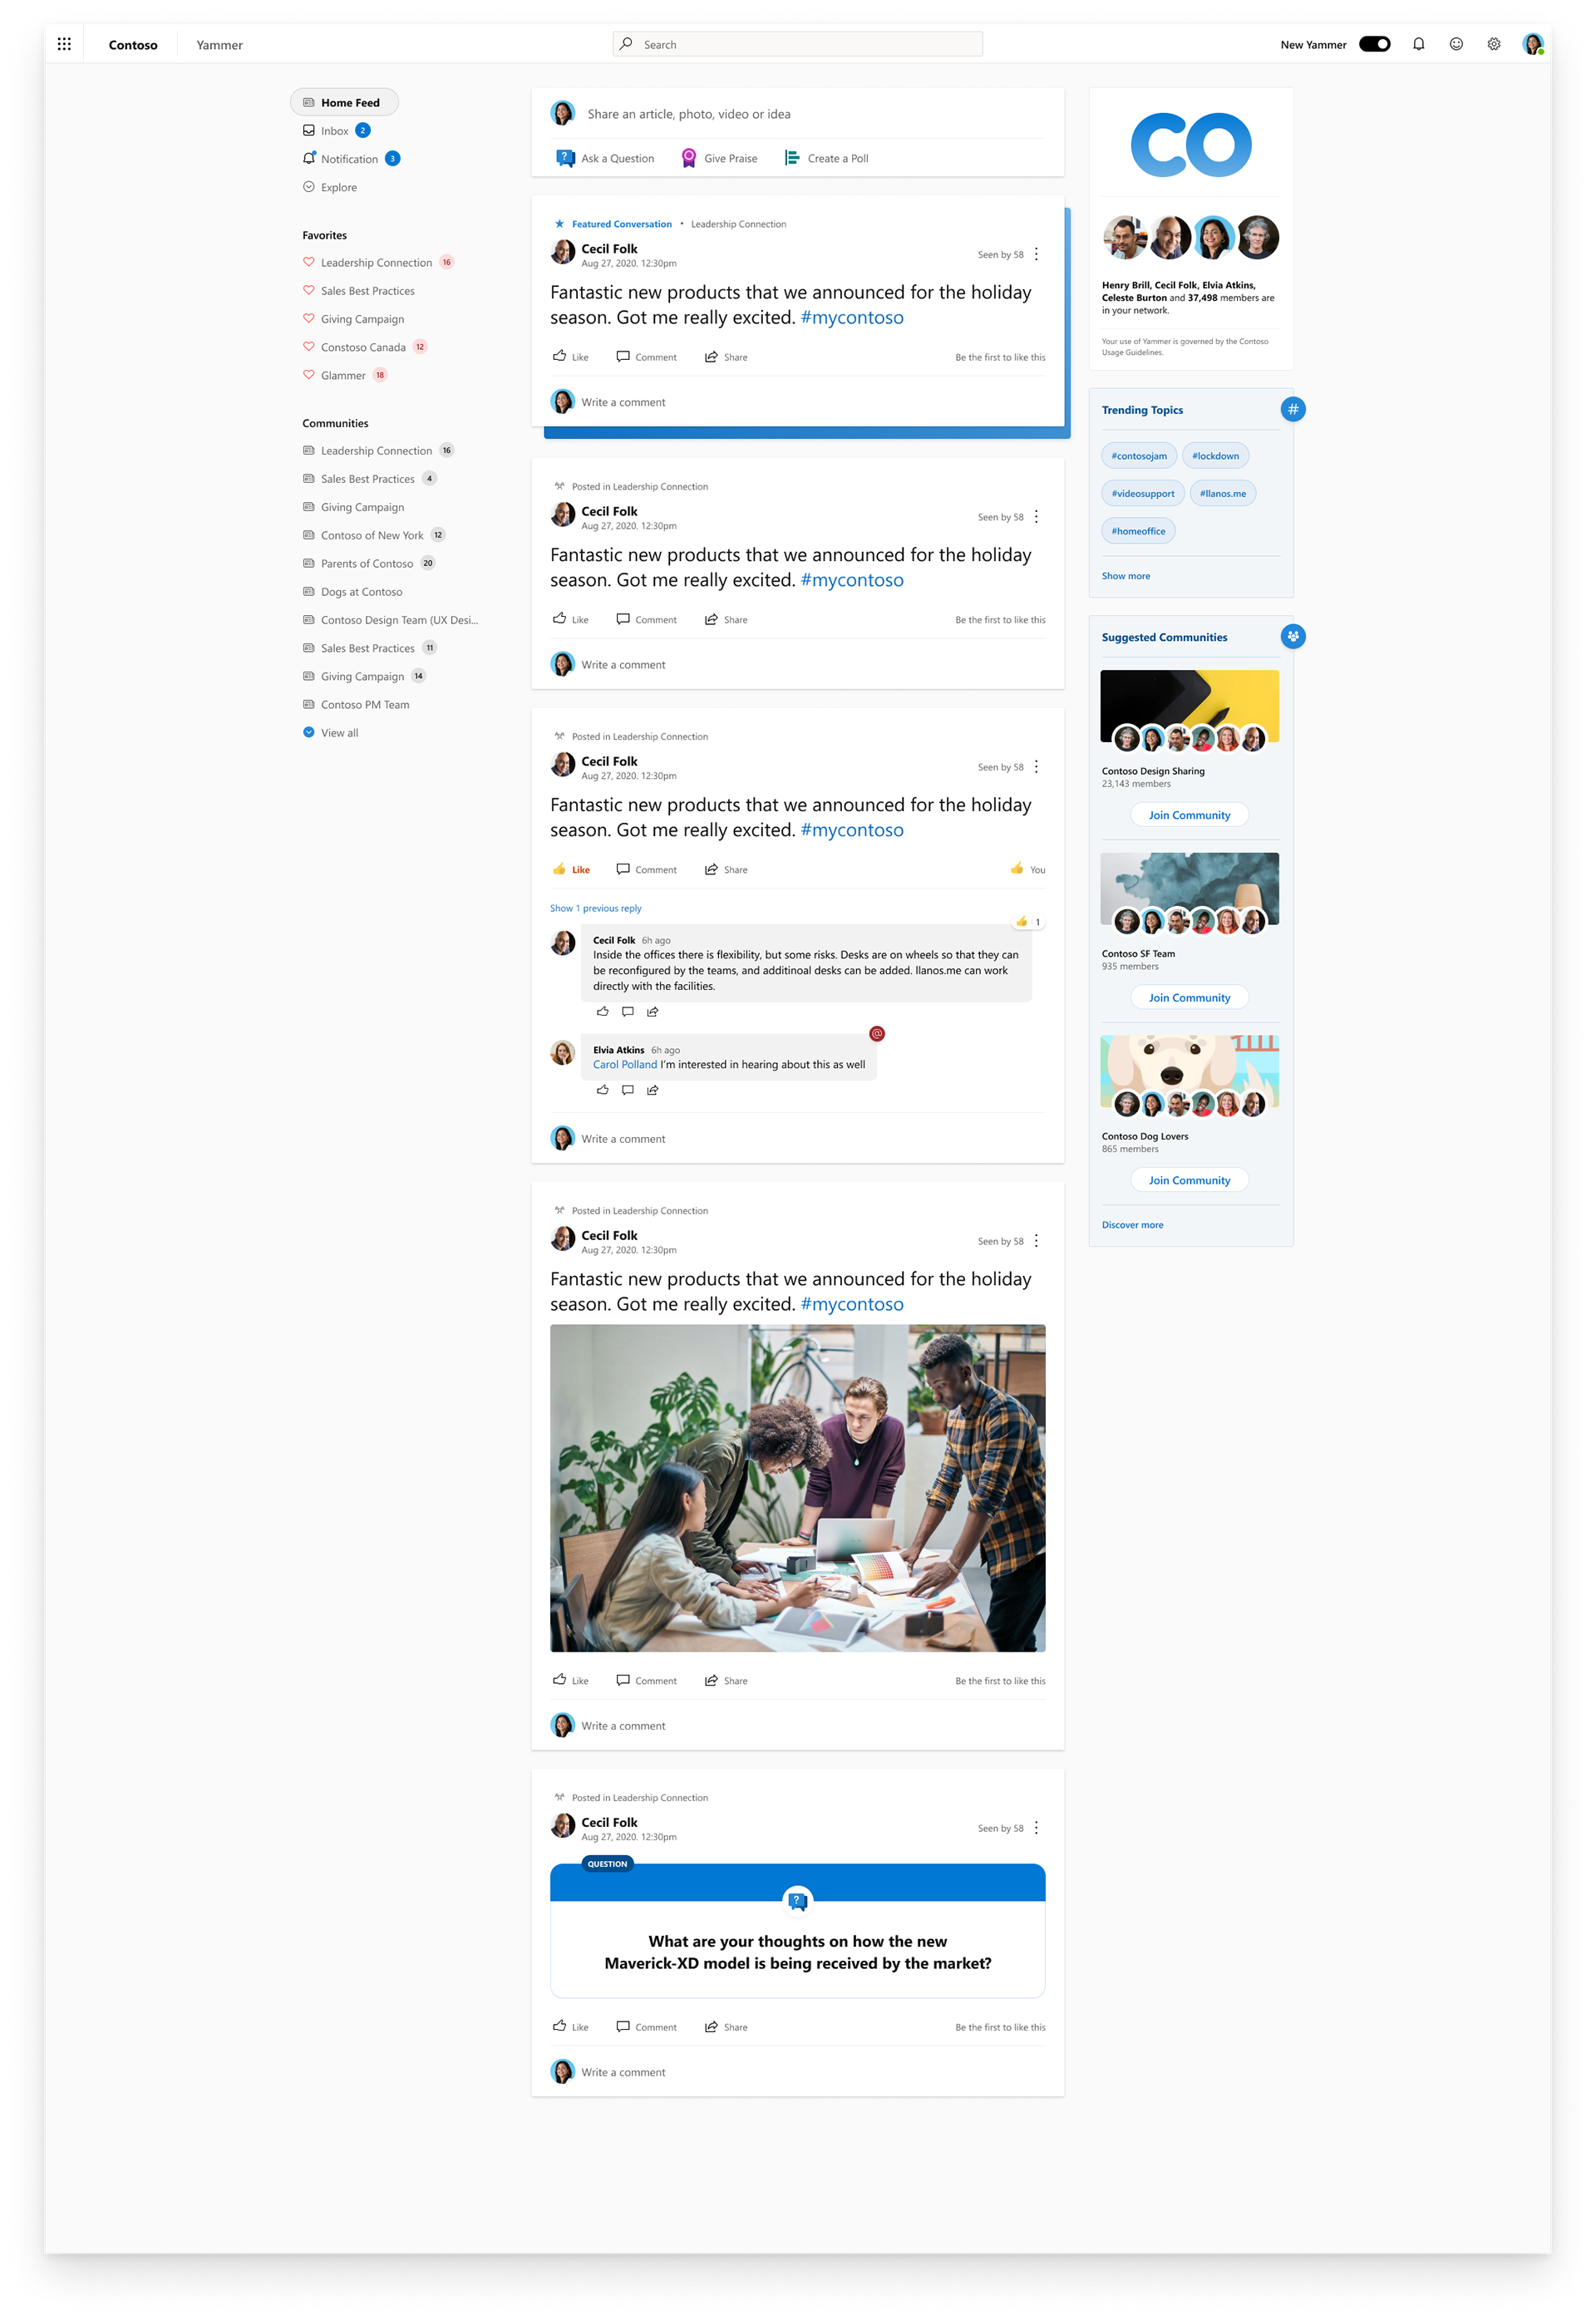
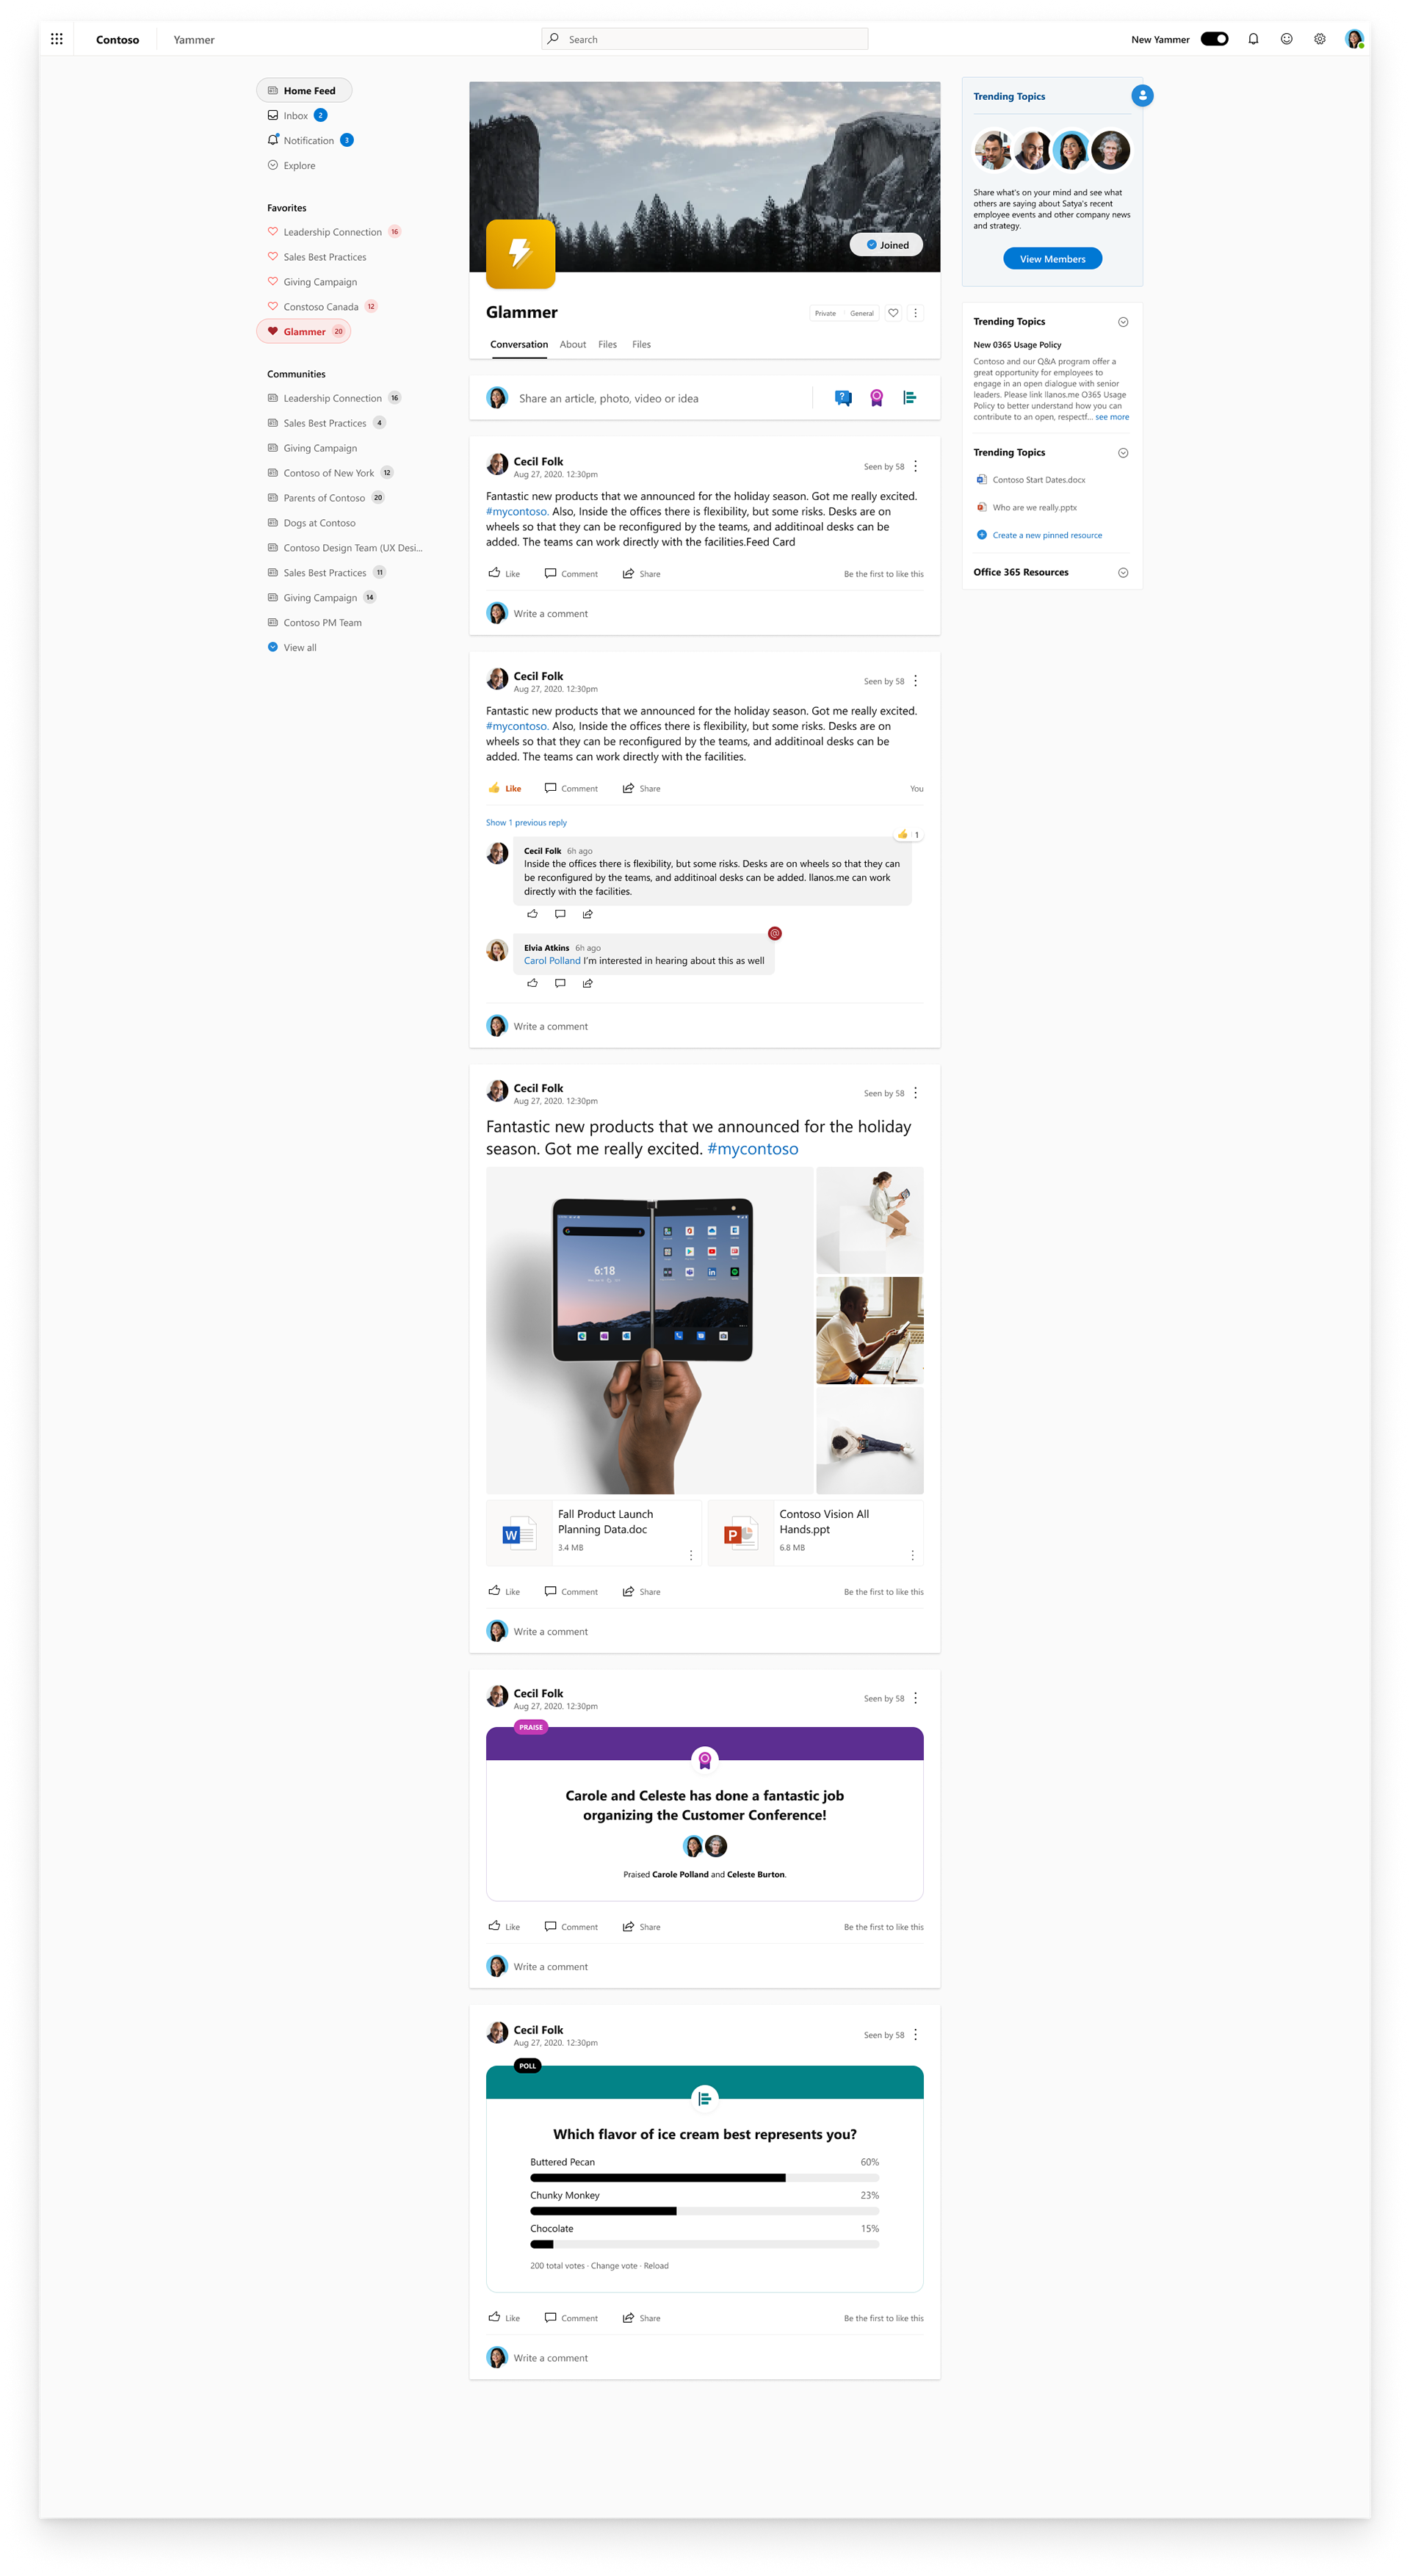
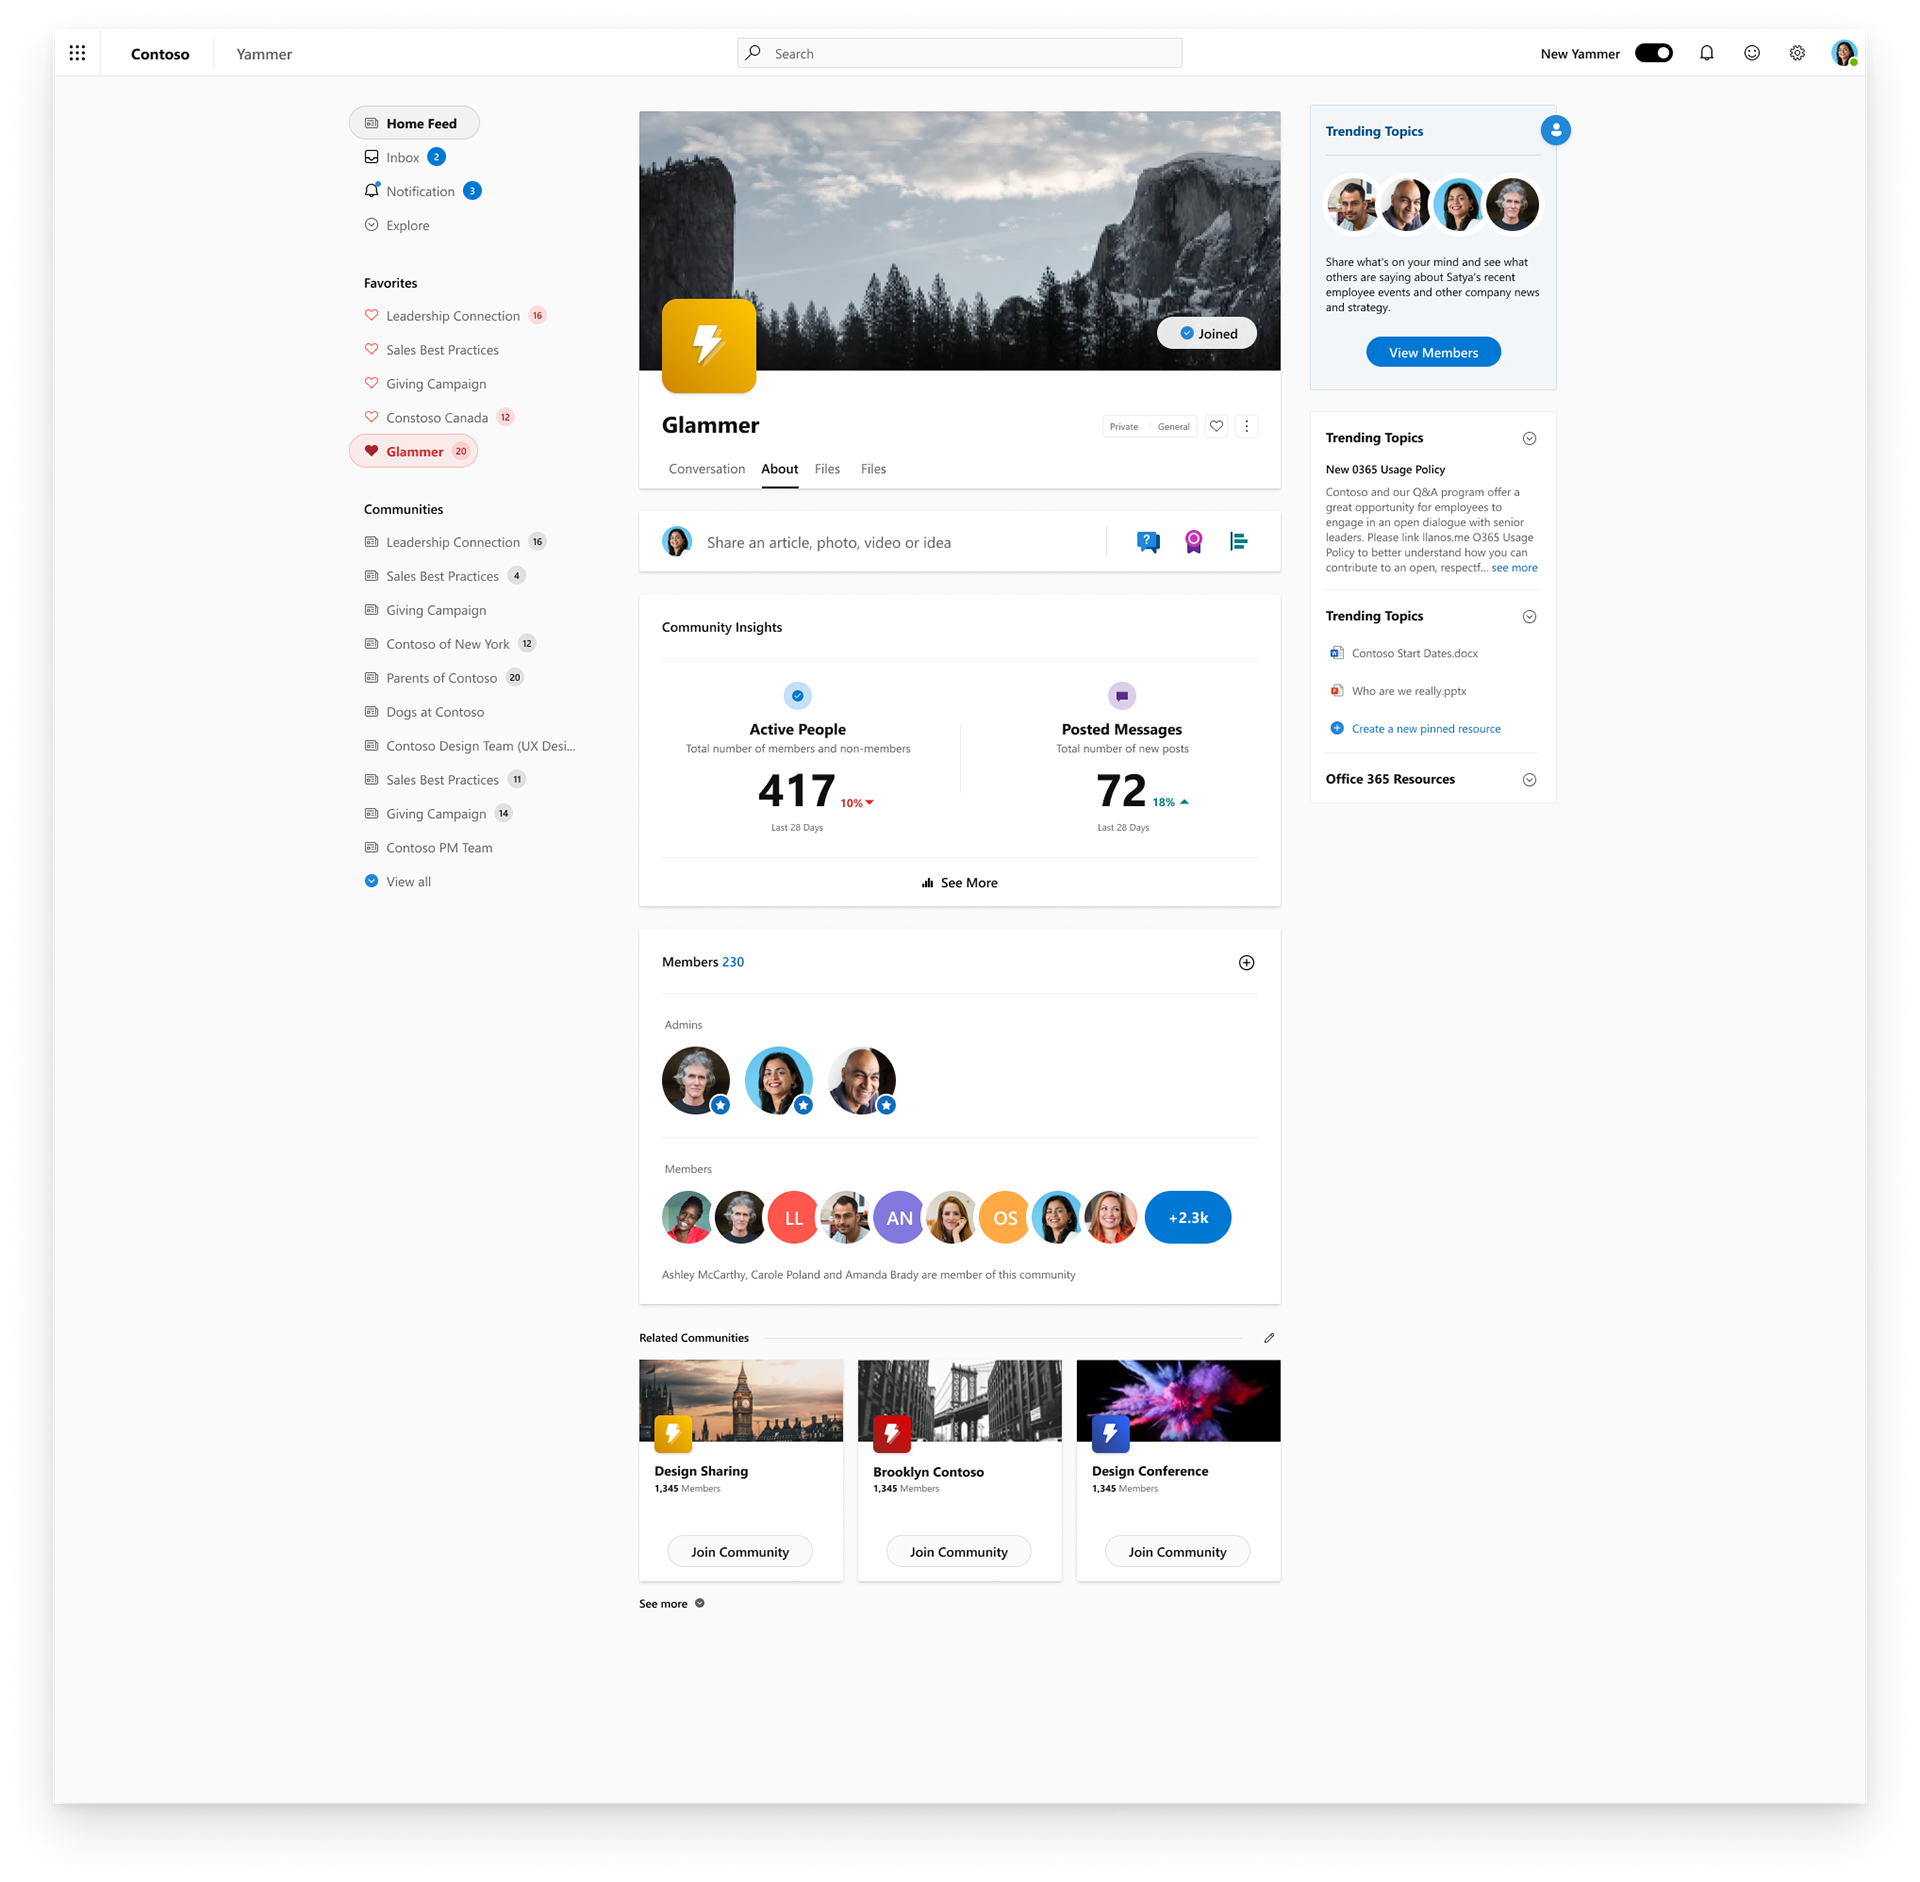
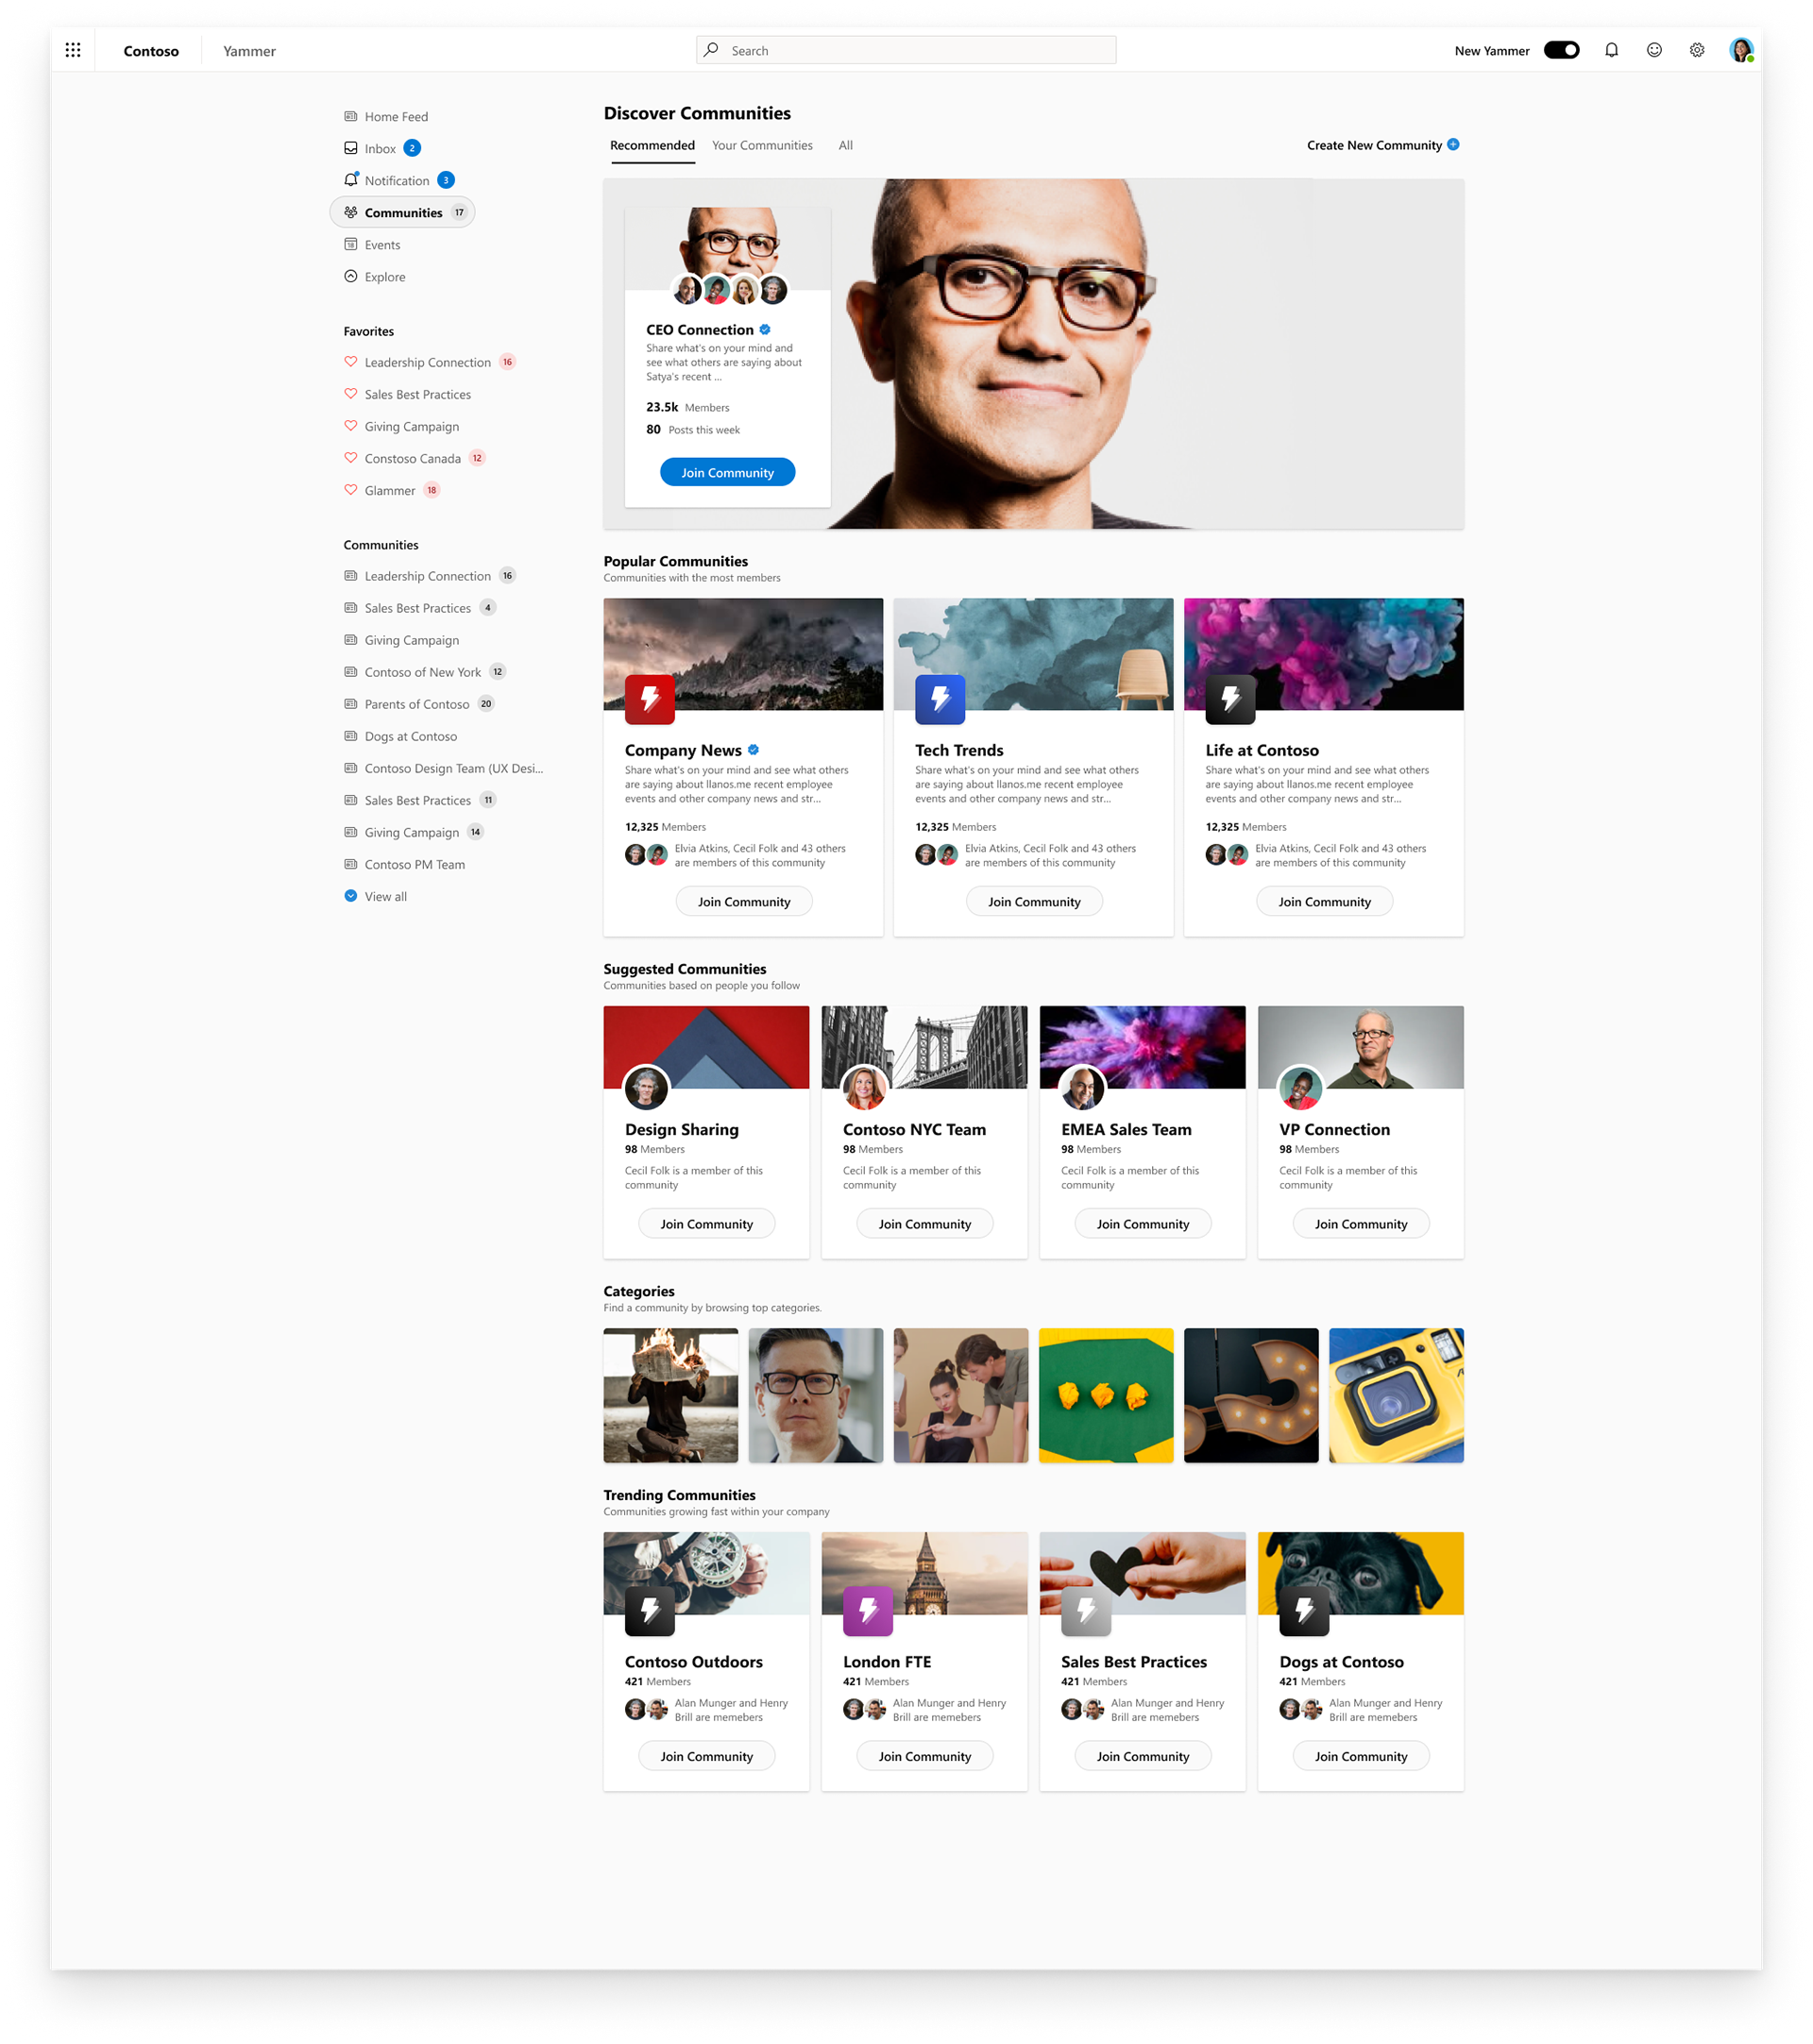
High Fidelity | A New Look
Below showcases the hard work we put into solving and redesigning Yammer. Yammer's redesign started August of 2018 and is still on going. Yammer will present a soft launch November 2019 and a full release Q2 - Q3 of 2020. Please come back and look for updates along with our design brief detailing the design process that helped redesign Yammer.
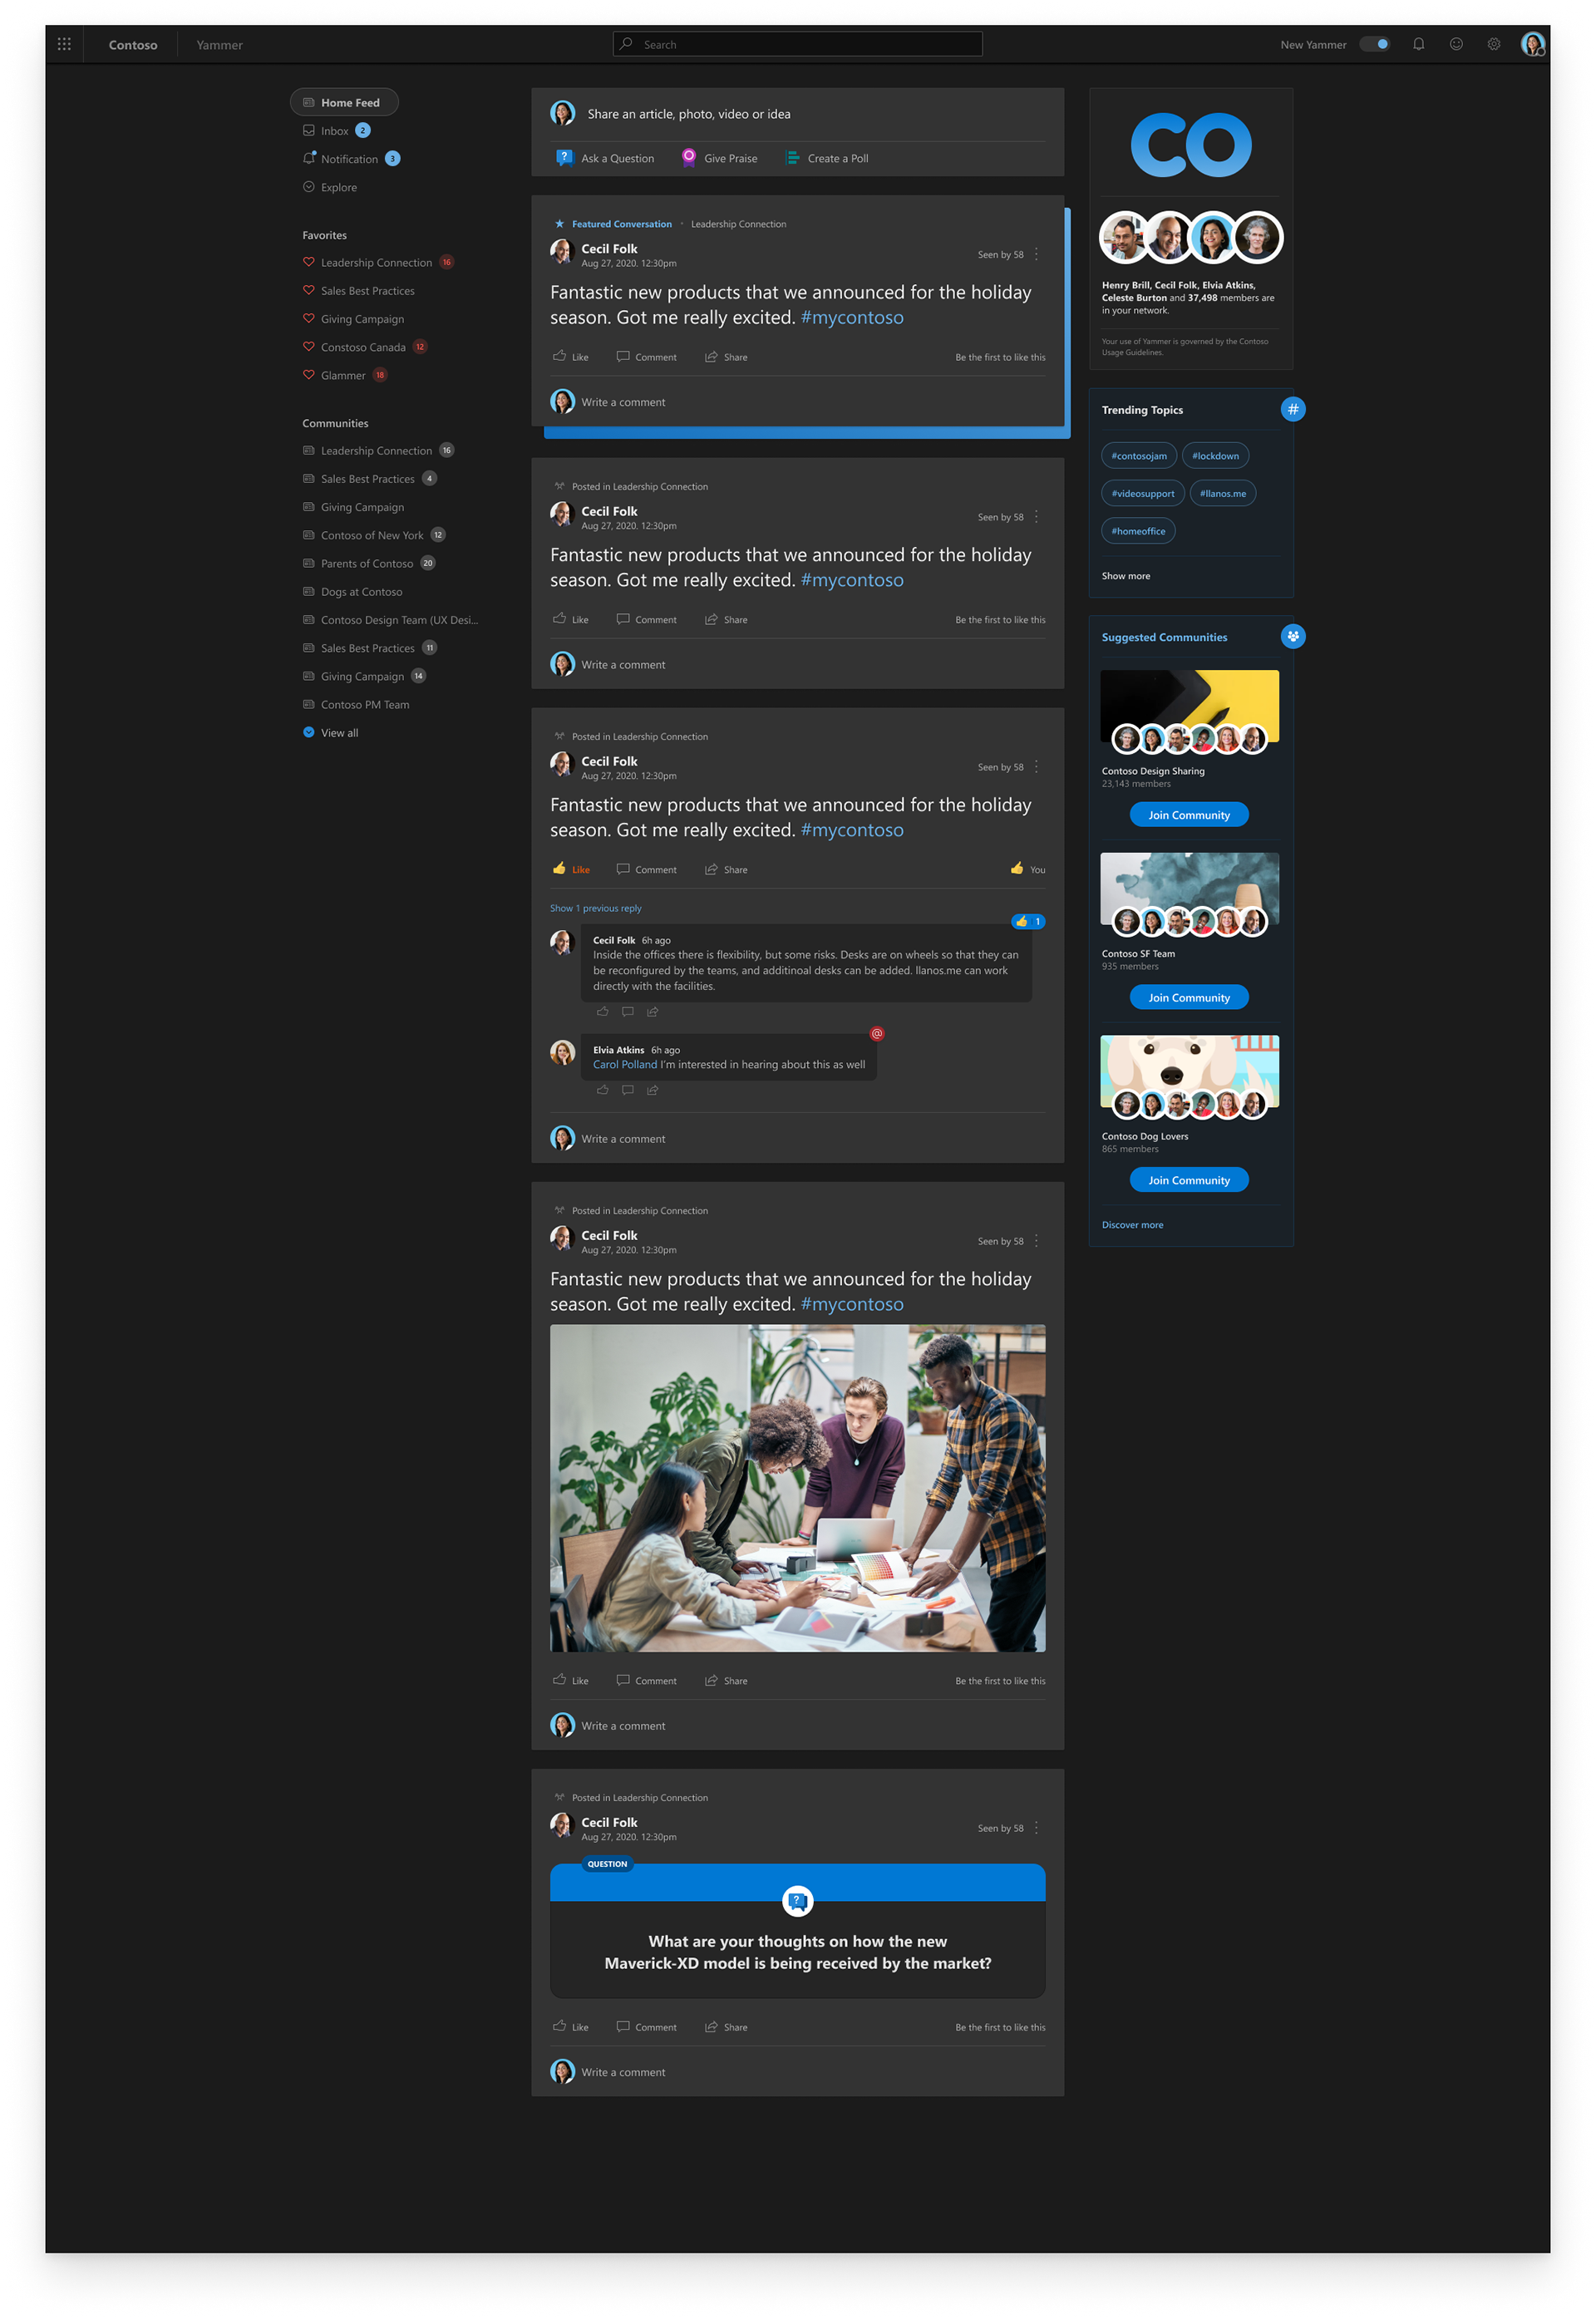
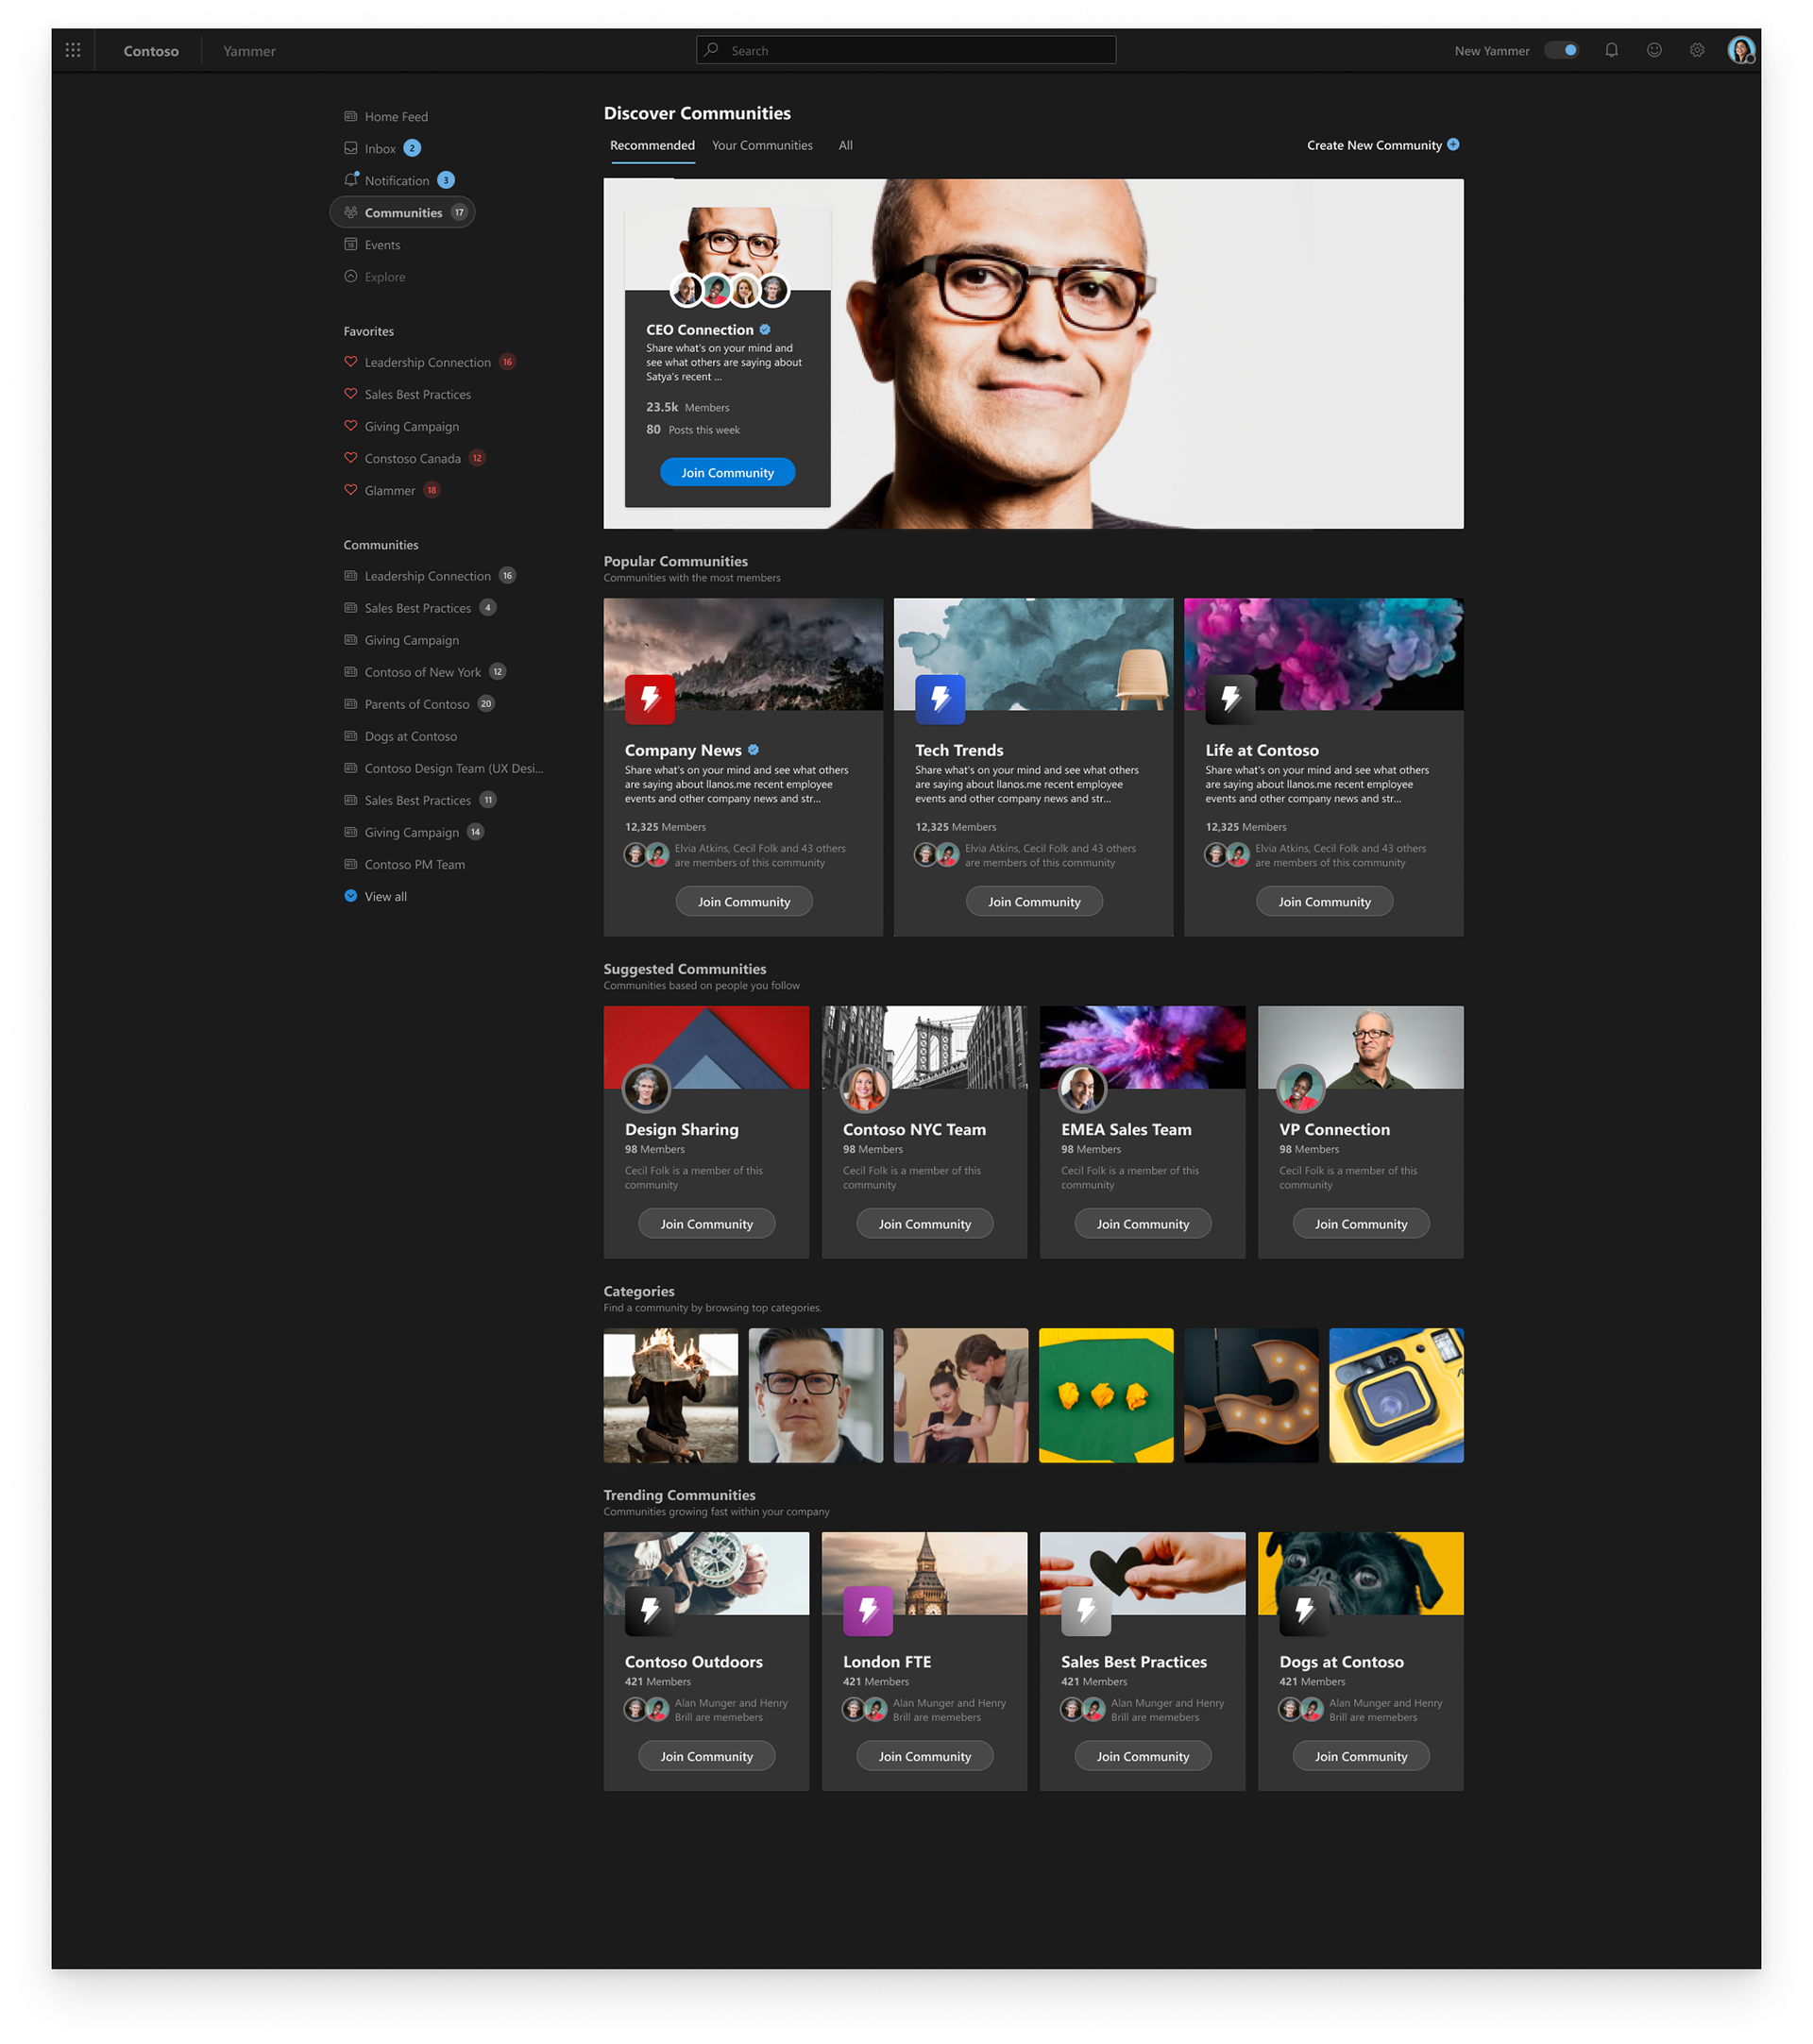
High Fidelity | Dark Mode

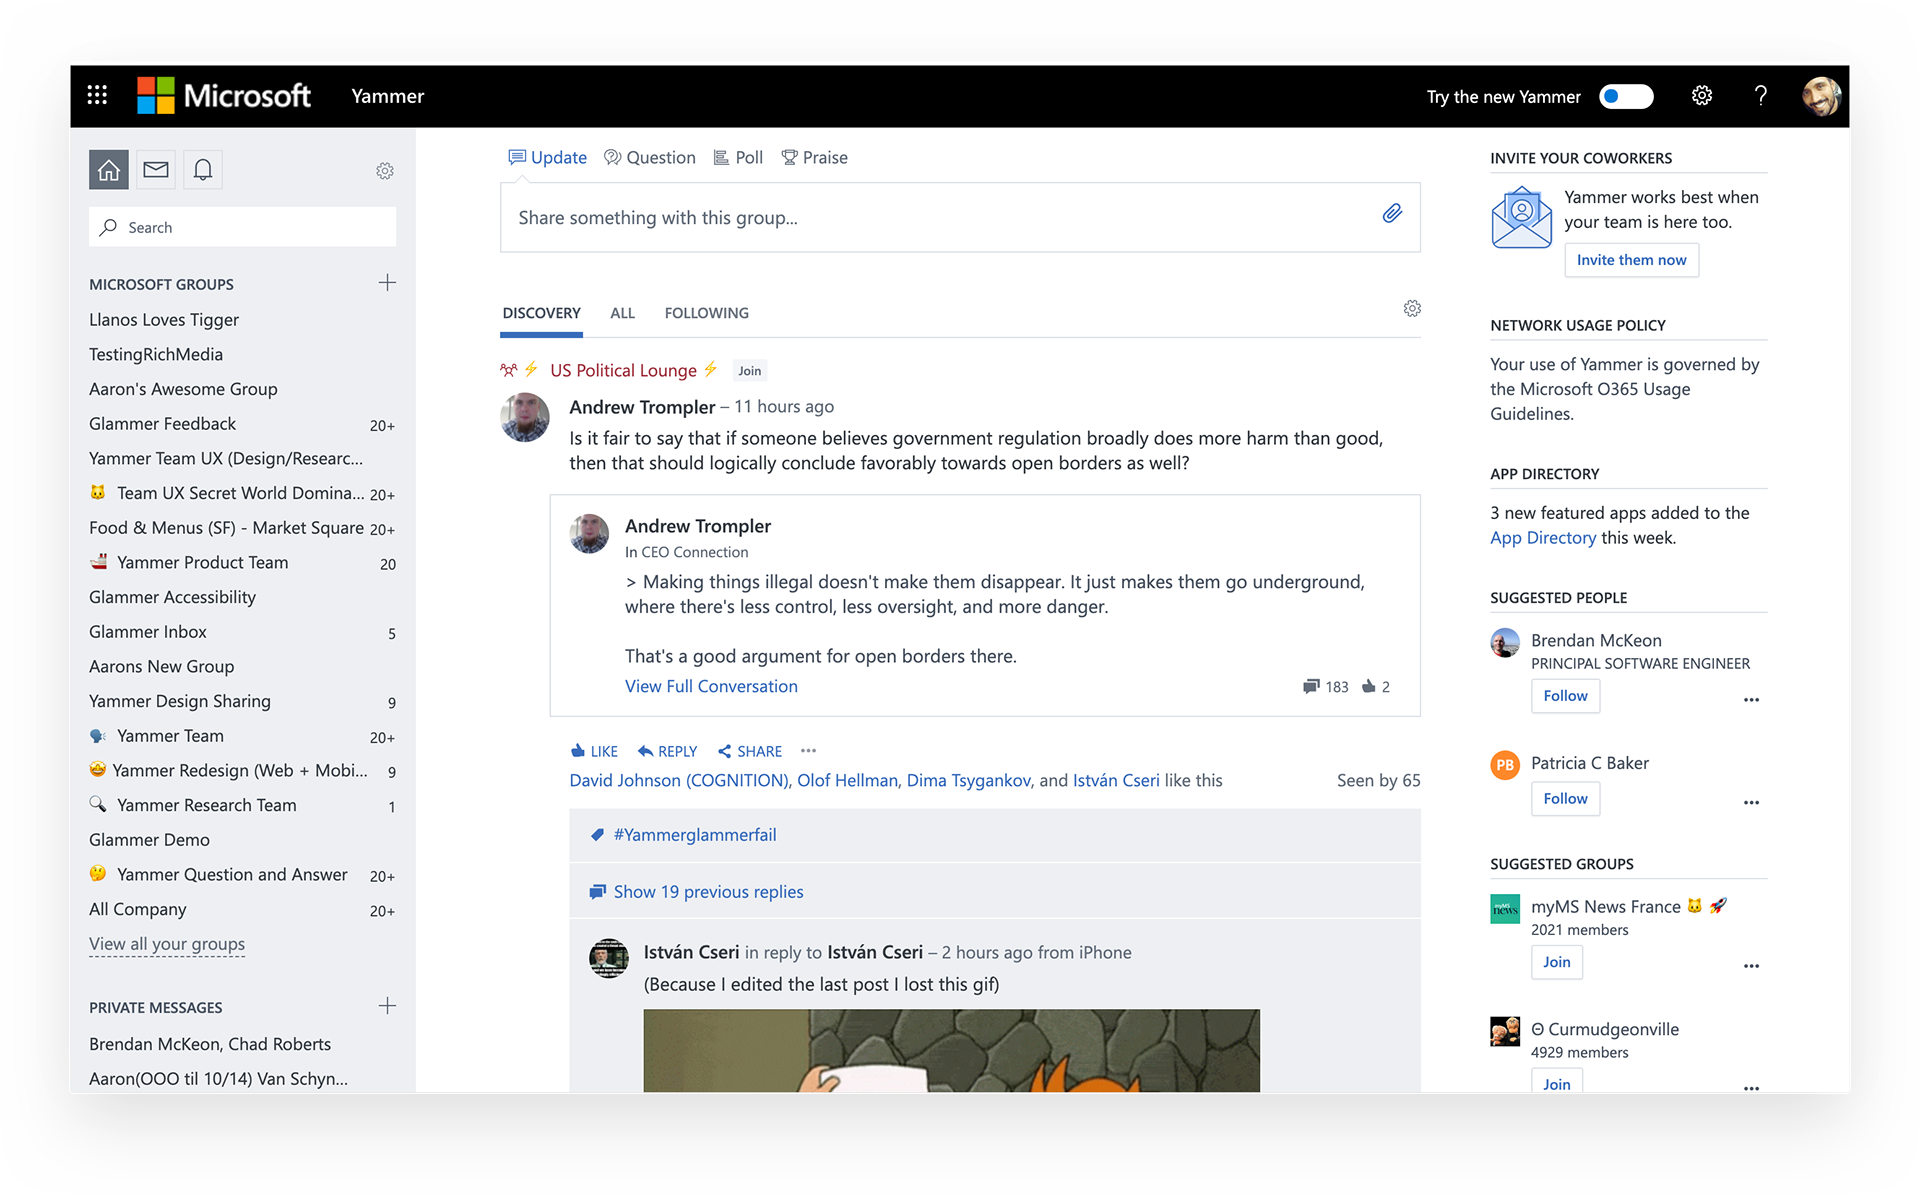
Old Yammer
Final Result | Outcome
The new Yammer is set for release Q1 - Q2 2020.
I am very lucky to be part of an intelligent, talented, design process - orientated team. Without the collaborative effort of all 5 product designers, leading this redesign effort would be quite difficult and almost impossible. I speak for the entire design team, we are very much looking forward to our customers experiencing the new Yammer.
I am very lucky to be part of an intelligent, talented, design process - orientated team. Without the collaborative effort of all 5 product designers, leading this redesign effort would be quite difficult and almost impossible. I speak for the entire design team, we are very much looking forward to our customers experiencing the new Yammer.